Easy Hairstyles: Practical Techniques To Do On Yourself Without Complicated Styling
A hairstyle can look simple from the front and still be frustrating to build on your own head. The real test is whether you can reach the working area, see enough of what you’re doing, secure the style without fighting your arms, and fix small mistakes without starting over.
That makes some supposedly basic styles surprisingly awkward. A perfectly centered French braid may demand more coordination than you want on an ordinary morning, while a low bun, loose side braid, puff, or claw-clip twist gives you much more control.
The easiest hairstyles to do on yourself usually have a clear anchor point and forgiving construction. They also work with the state your hair is already in instead of requiring you to completely reshape it first.
Fast Styles Built Around One Anchor
Low Ponytail
The low ponytail is one of the most forgiving self-styles because the anchor sits where both hands can reach comfortably. Brush, comb, or finger-gather the hair toward the nape and secure it with a fabric-covered elastic. You can leave the crown smooth, allow some natural volume, or loosen the front slightly after the ponytail is secure.
This style also works across many hair states. Straight, stretched, wavy, curly, and relaxed hair can all form a low ponytail without requiring the same surface finish. A sleek version usually takes more preparation than a softer one, so don’t turn an easy hairstyle into unnecessary work unless the smooth finish is the feature you want.
High Ponytail
A high ponytail gives more lift and movement than its low counterpart, but reaching the crown makes placement slightly harder. Gather the hair with your head upright once you’re close to the final position; styling while bent forward can leave the ponytail sitting differently after you stand up.
Thicker or heavier lengths can pull more noticeably from a high anchor. The ponytail should feel secure during normal movement without requiring an aggressively tight elastic.
A little unevenness around the crown is often easier to correct after securing the ponytail. Use your fingers or the end of a comb to adjust small sections instead of repeatedly taking the whole style down.
Claw-Clip Twist
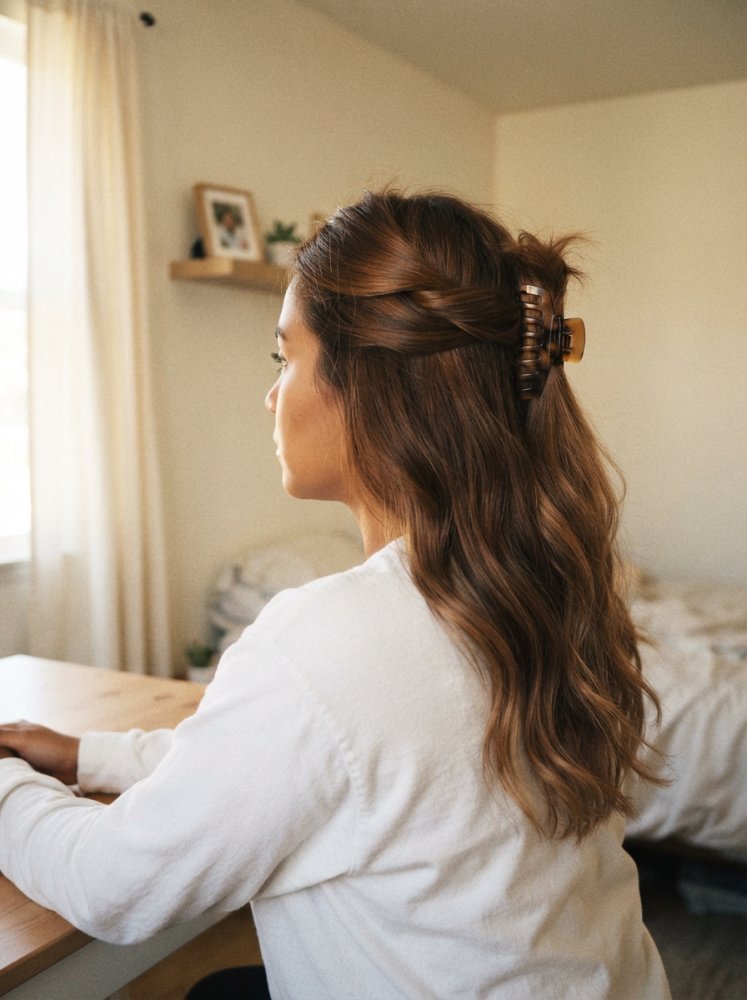
A claw-clip twist is hard to beat when you want your hair up without constructing a full bun. Gather the hair near the back of your head, twist the length upward, fold or tuck the ends according to your hair length, then close the clip over the twist.
The clip matters more than perfect technique. It needs enough room and grip for the amount of hair you’re securing. Very dense hair may overwhelm a small clip, while a large, heavy clip can feel unnecessary on lower-density hair.
This is also a good option when you don’t want an elastic compressed around one small section of hair. The finished twist can be neat or intentionally loose because the clip itself provides much of the structure.
Low Twist Bun
A low bun becomes much easier to build when you treat it as a ponytail plus one additional step. Make a low ponytail, twist the loose length, wrap it around the base, and secure the coil with pins or another elastic.
This is the stronger choice over a high bun when your shoulders tire quickly during styling. Most of the construction happens at the nape, where your hands can work without staying overhead.
Long or dense hair may need several pins placed around the bun instead of one pin forced through the center. Spread the support around the shape so the bun doesn’t rotate or sag as you move.
Top Knot
A top knot is useful when the main goal is getting every bit of length away from your neck. Start with a high ponytail, then twist or loosely coil the length around its base.
A compact knot creates a cleaner outline. Leaving more width through the bun gives a fuller, softer shape. Either approach is easier to control once the ponytail itself is stable.
This style becomes less forgiving as hair gets heavier because all of that length sits high on the head. A mid-height or low bun is usually more comfortable when you like wearing your hair up for long stretches.
Half-Up Styles That Keep the Length Visible
Half-Up Ponytail
The half-up ponytail solves a common problem: you want the hair away from your eyes but don’t want to hide the length. Section the hair above the ears or take a smaller crown section, bring it toward the back, and secure it.
You don’t need a perfectly straight part across the back. In fact, a softly finger-parted section often suits casual styling better because tiny irregularities disappear underneath the loose hair.
The height changes the effect more than the exact amount of hair you gather. A higher anchor adds crown lift, while a lower one keeps the profile softer and places less emphasis on the ponytail itself.
Half-Up Bun
Choose the half-up bun when an ordinary half ponytail feels unfinished but a full bun removes too much of the hair you want to show. Gather the upper section, twist it loosely, and wrap it into a small bun.
The lower hair can stay straight, wavy, curly, or coily. That makes this especially useful on days when the loose lengths already look good and only the front or crown needs managing.
Keep the bun proportional to the amount of hair in the section. Pulling too much of the lower density into the bun can leave the remaining hair looking sparse at the back.
One-Side Pin-Back
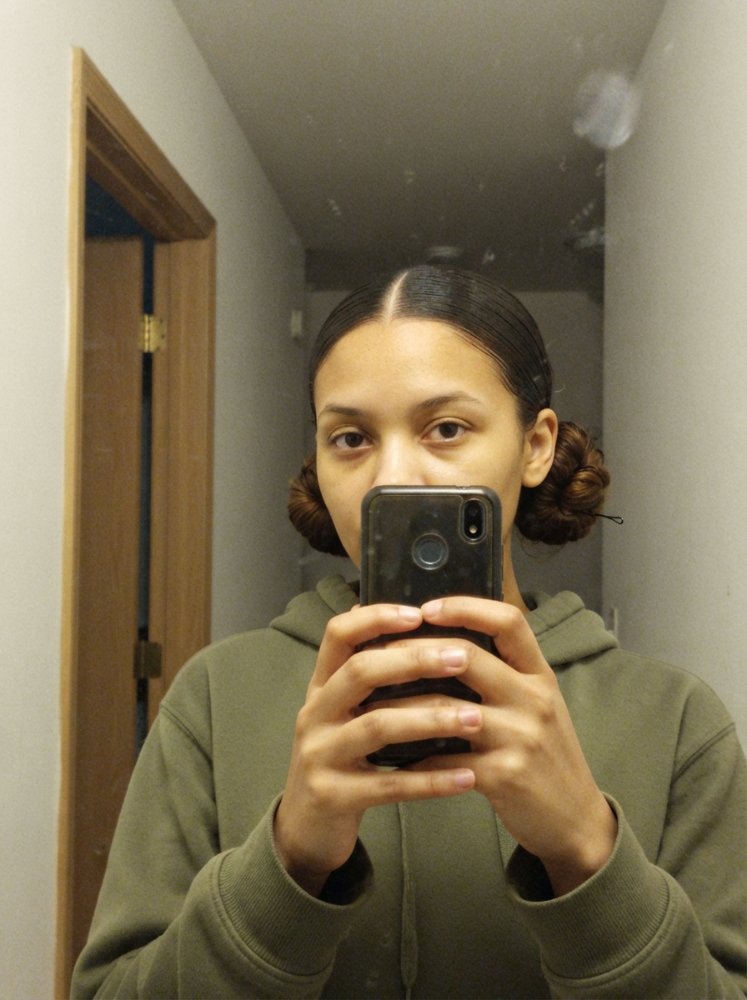
Sometimes the easiest hairstyle is the one that solves only the part that’s bothering you. A one-side pin-back removes hair from the face while leaving almost everything else untouched.
Take a section around one temple, smooth or loosely twist it backward, and secure it above or behind the ear with bobby pins or a clip. The asymmetry becomes part of the look rather than something you need to correct.
It’s particularly useful with waves and curls because you don’t have to disturb the rest of the pattern just to make the front manageable.
Braids and Twists You Can Control Without Seeing the Back
Single Three-Strand Braid
A single braid becomes much easier when you bring the hair over one shoulder before you start. Divide the length into three sections and cross the outside sections toward the center until you reach the ends.
Starting low reduces the amount of behind-the-head work. The result is also forgiving: small differences in section size usually read as softness rather than a failed braid.
Straight and stretched hair can produce a more defined braid pattern. Curly or coily hair may create a fuller, more textured braid, particularly when the curl pattern remains visible through the sections.
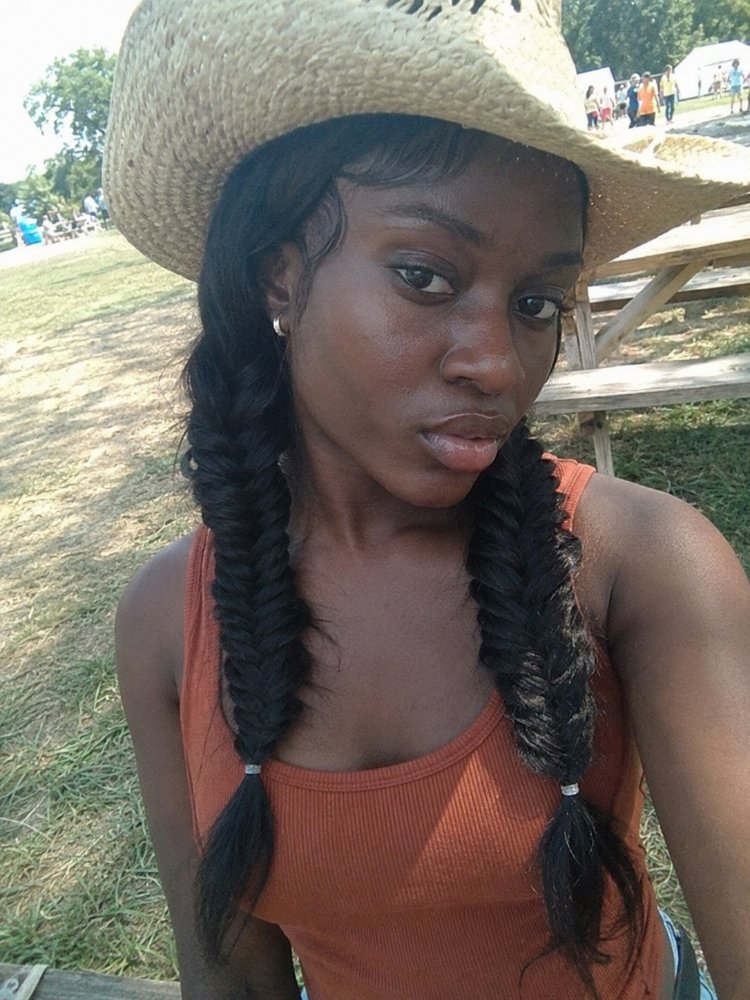
Two Low Braids
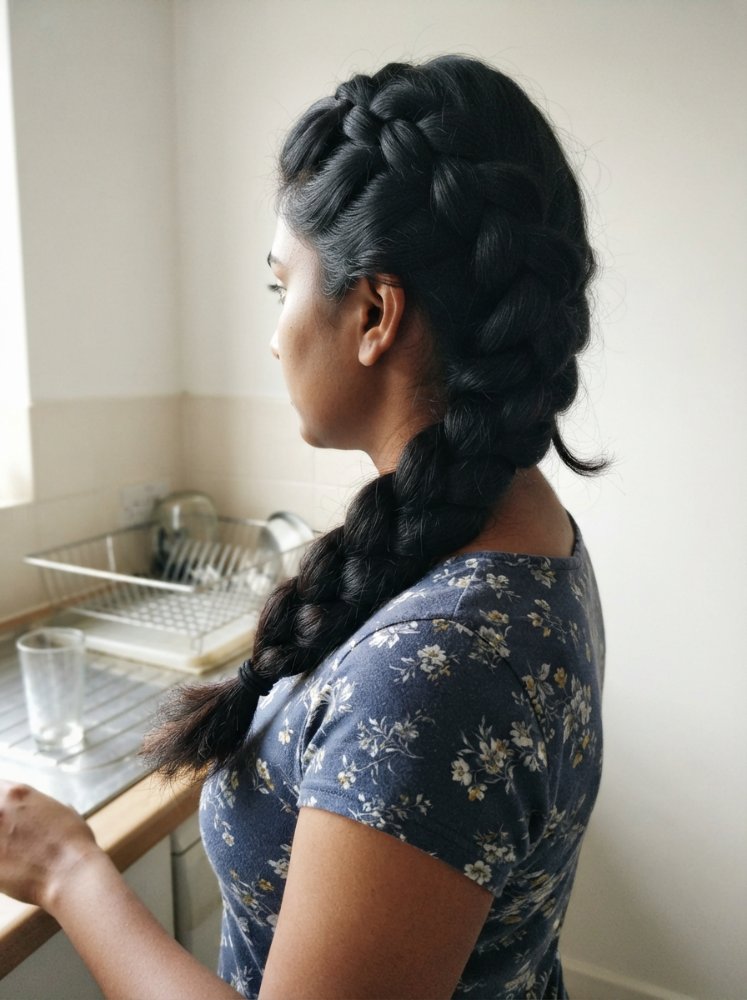
Two low braids are easier to self-style than many single centered braids because each side stays within your field of view. Split the hair into two main sections, bring each one forward, and braid separately.
A center part gives the most balanced result, but it doesn’t need to be ruler-straight for an everyday style. Use two mirrors only if the back part genuinely matters to you.
This style is also practical for keeping long hair controlled without putting the entire length into one heavy anchor. The two braids can rest forward over the shoulders instead of moving constantly across the back.
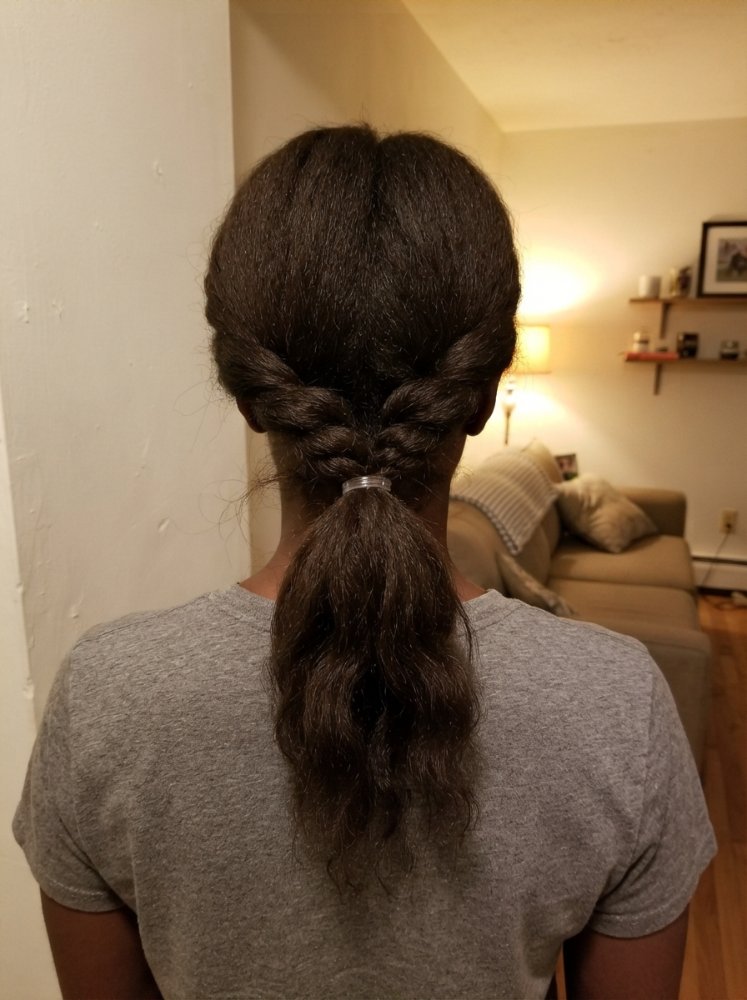
Rope-Twist Ponytail
The rope-twist ponytail gives you the detail of a braid with fewer working sections. Secure a ponytail, split the length into two pieces, twist each section, then wrap the sections around each other.
The construction is easiest to follow when you keep consistent hand tension through the length. You don’t need to pull hard; you simply want the two sections to stay organized as you work downward.
Hair with lots of natural texture may produce a softer rope outline, while smoother hair makes the spiral easier to see. Secure the end before releasing your grip.
Bubble Ponytail
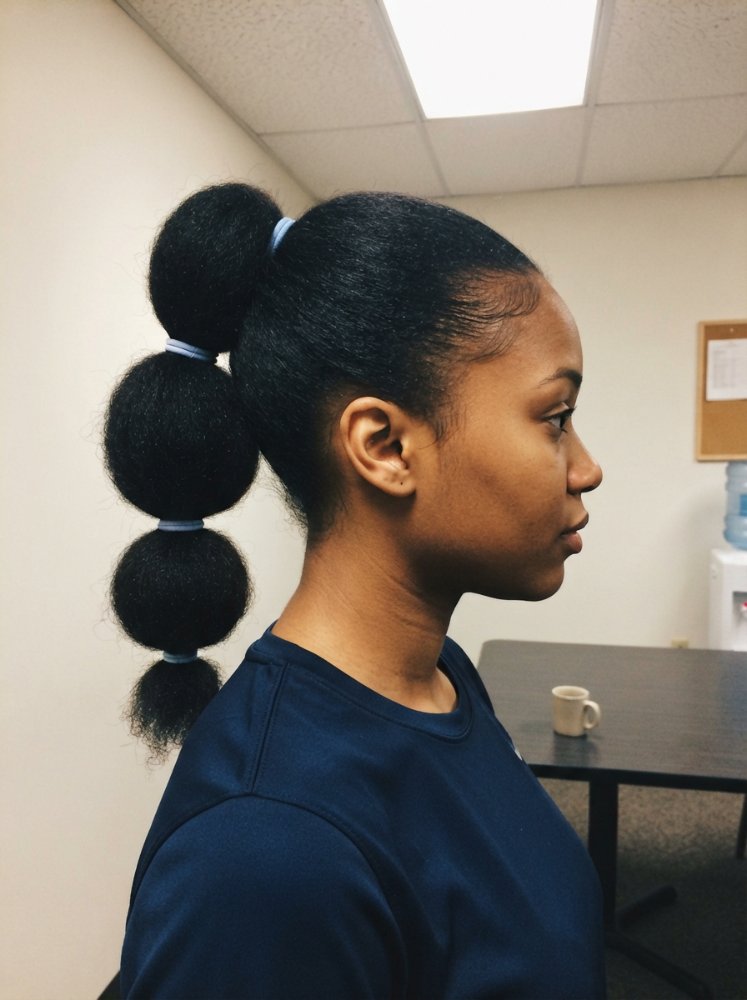
Braiding isn’t required to make a plain ponytail look more detailed. Start with a ponytail and add additional elastics down the length, leaving space between them. Gently spread the hair within each section to create rounded bubbles.
This is one of the easier choices for anyone who struggles to keep three braid sections organized. You can see most of the construction by bringing the ponytail over your shoulder.
Avoid tightening every elastic simply to make the bubbles look crisp. The rounded shape comes from spreading the hair between anchor points, not from squeezing the sections as tightly as possible.
Topsy-Tail Ponytail
The topsy-tail changes the shape of a ponytail without asking you to braid or pin an updo. Secure a low ponytail loosely, create an opening in the hair just above the elastic, and flip the ponytail through the opening.
That small rotation creates a twisted effect at the base. It works well on medium and longer lengths where there’s enough hair to pull through comfortably.
A low placement is easier to manage on yourself because you can feel the opening and guide the ponytail through with both hands. You can leave the tail loose or continue with a braid when you want more structure.
Easy Hairstyles for Curly and Coily Hair
Curly or Coily Puff
A puff works with natural volume instead of asking you to flatten it. Gather the roots toward the position where you want the puff to sit, then secure the base with an appropriate elastic, band, or similar flexible anchor.
The visible feature is the free texture, so spend your effort on the outline rather than forcing every curl or coil into identical definition. You can adjust the puff with your fingers once the base feels stable.
Shrinkage changes the finished height and width. Style for the shape your hair actually takes in its usual state rather than judging the result against stretched-hair reference photos.
Double Puffs
Double puffs create a completely different outline from one large puff while keeping the styling method straightforward. Divide the hair into two sections and secure each side independently.
The placement can sit lower for a relaxed shape or higher for more visible volume. The important part is balancing the two anchors from the front rather than repeatedly chasing an invisible perfect line at the back.
This style is especially useful when one large puff makes the hair feel difficult to distribute evenly. Two smaller sections give you more direct control over where the volume sits.
Pineapple Updo
The pineapple isn’t limited to nighttime. Worn intentionally, it creates a loose, high arrangement that lets curls and coils fall forward or outward from the crown.
Gather the hair upward with minimal reshaping of the lengths. The curl pattern supplies most of the visible detail, so the style works particularly well when the ends still have definition but the roots need a different arrangement.
A soft, loose base keeps the style looking airy. Hair that’s very long may fall farther to one side instead of forming the compact fountain shape often shown on shorter curly lengths, which is simply a different result rather than a styling error.
Simple Updos With More Shape
Space Buns
Space buns are more work than one bun, but they’re easier to build symmetrically than a complicated centered updo because each side is reachable. Divide the hair into two sections, make two ponytails, then wrap each tail around its own base.
Don’t obsess over making the buns identical. Hair density, growth patterns, and hand dominance can make one side sit slightly differently. Adjust their visible size from the front instead.
The style works especially well when you want all the hair contained but a single top knot feels too concentrated. Keeping the buns around mid-height also makes them easier to pin than very high placements near the crown.
Rolled Headband Updo
A rolled headband updo uses the accessory as the structure of the hairstyle. Place a flexible headband around the head, then tuck sections of hair upward and into the band along the back.
Work from the sides toward the center so you aren’t trying to hold the entire length at once.
The style is most manageable when the hair can bend and tuck without constantly slipping free. Very short layers may need pins, while very thick lengths can create a fuller roll that requires a stronger anchor.
From the front, it reads like a more involved tucked updo even though the construction remains repetitive and easy to feel with your hands.
Which Easy Style Fits the Hair You Have Today?
Your starting hair matters almost as much as your skill level. A hairstyle that requires smoothing, stretching, curling, or reworking the entire head isn’t especially easy just because the final construction has two steps.
What Makes a Hairstyle Easier to Do on Yourself?
Self-styling gets simpler once you stop choosing styles solely by how easy they look in photographs. Construction matters more.
Keep the main working area reachable. A nape-level ponytail or side braid lets you see or feel what you’re doing. Elaborate work at the center back of the head demands more coordination because your hands are operating outside your direct view.
Use your current texture whenever possible. Curly hair doesn’t need to be straightened before going into a puff. Wavy hair doesn’t need to become perfectly sleek before you make a low ponytail. Starting from the hair you already have eliminates the most labor-intensive part of many routines.
Build complicated-looking styles from simple anchors. A bun starts with a ponytail. A rope twist can start with a ponytail. Space buns start with two ponytails. Securing the foundation first gives you a stable place to work from instead of trying to control every section at once.
Fix small areas instead of restarting. A loose crown section can often be adjusted with your fingers. A bun that’s slightly wider on one side can be repinned. A bubble ponytail can be reshaped after all the elastics are in place. Trying to perfect every section during construction makes easy hairstyles unnecessarily frustrating.
The same principle applies to smoothness. Flyaways and natural texture don’t automatically make a hairstyle look unfinished. Decide how sleek you actually want the result before adding extra brushing or product.
Comfort Matters More Than an Extra-Secure Hold
An easy hairstyle shouldn’t depend on discomfort to stay together. A tightly pulled ponytail, puff, bun, or pair of puffs may remain visually neat, but repeated strong pulling can put unnecessary stress on the hairline and other anchor areas.
Use the amount of hold the hairstyle genuinely needs. Pins can support a heavy bun. A larger claw clip may hold dense hair better than forcing a smaller one closed. Two separate anchors sometimes distribute hair more comfortably than gathering everything into one high ponytail.
Check the style while turning your head and moving normally. A stable hairstyle should stay in place without persistent pulling, stinging, or soreness.
Pain, sores, persistent irritation, sudden shedding, or a concerning change in density deserves more attention than another styling adjustment. Remove or loosen a style that’s causing discomfort, and consider talking with a dermatologist or another qualified healthcare professional when symptoms persist or are concerning.
A Better Way to Practice Self-Styling
Start with hairstyles that teach one skill at a time.
A low ponytail teaches gathering and anchor placement. Turning that ponytail into a bun adds wrapping and pinning. A single braid teaches three-strand hand coordination. Once that feels natural, dividing the head for two braids becomes less intimidating.
Use mirrors selectively. A second mirror helps when the appearance of the back genuinely matters, but constantly checking every movement can make styling harder. Many simple buns, twists, puffs, and ponytails are easier to build largely by feel and inspect afterward.
Your dominant hand will probably control one side more easily. Work with that instead of expecting both hands to behave identically from the beginning.
Reference photos are most useful for choosing the general placement and shape. They rarely show the exact amount of hair, shrinkage, hidden pins, natural growth patterns, or preparation underneath the finished style. Matching the mechanics to your own hair is more useful than reproducing every tiny detail.
Related Hairstyles to Explore
- Easy prom hairstyles to do yourself
- Quick and easy hairstyles for kids
- Hair Inspo Aesthetic
- Dimensional Brunette for women
FAQs
What is the easiest hairstyle to do on yourself as a beginner?
A low ponytail is one of the strongest starting points because both hands can reach the nape easily and the construction requires only one main anchor. A claw-clip twist is another good option when your hair length and density work well with the clip.
What easy hairstyles work on short hair?
Short hair can work well with half-up styles, one-side pin-backs, small puffs where the texture allows them, and clips that secure the longer sections. The useful style depends on which areas are long enough to reach an anchor. Trying to force very short perimeter pieces into a distant ponytail or bun usually adds more difficulty than it solves.
Can I do these hairstyles on natural curly or coily hair without straightening it?
Yes. Puffs, double puffs, pineapples, half-up styles, braids, buns, and many ponytail variations can all be adapted to natural curly or coily hair. Account for shrinkage and build the hairstyle around the texture and shape you actually plan to wear.
How can I make an easy hairstyle look more finished without making it complicated?
Concentrate on one visible detail. Clean up the part, adjust the volume at the crown, tuck the ends of a bun, reshape a puff with your fingers, or pin one loose section. Improving one focal area is usually more effective than rebuilding the entire hairstyle for perfect smoothness.
Hair Texture & Upkeep Style Matcher
Select your natural hair texture and daily maintenance window to get an instant styling formula and heat safety cap.
Heat Cap: 320°F (160°C)
A versatile three-strand braid beginning at the parietal ridge, securing the top half while allowing natural wave texture to flow freely around the shoulders.
Conclusion
The easiest hairstyles to do on yourself are usually the ones with simple construction, reachable anchor points, and enough flexibility to work with your hair as it already is.
Start with low ponytails, claw-clip twists, puffs, simple braids, or half-up styles before moving toward anything that requires more sectioning or behind-the-head coordination. Once a basic anchor feels automatic, buns, twists, bubbles, and more structured updos become much easier to build.
Choose the style that removes the problem you actually have that day—hair in your face, too much length on your neck, curls that need reshaping, or loose hair that won’t stay controlled. Easy styling works best when you’re solving one practical problem rather than trying to reproduce every detail of a complicated reference photo.
Editorial Standards & Hair Health Guidance
Every style featured on Tress Atlas is curated with a focus on real-world wearability, scalp tension management, and cuticle preservation. When trying protective styles or tight updos, ensure perimeter hairline sections remain tension-free to avoid traction stress on delicate follicles. For heat styling, cap tools below 350°F (180°C) to prevent thermal keratin denaturation.
Scientific Sourcing: Practices aligned with the American Academy of Dermatology (AAD) on traction alopecia risk reduction and cosmetic trichology research on hair tensile strength.