Rubber Band Hairstyles: Shape, Tension, and the Details: Styling Guide & Cuts That Change the Result
Rubber band hairstyles use small hair elastics to divide, connect, or anchor sections of hair. The bands may create the visible design, guide hair toward a puff or ponytail, or form a foundation for braids and twists.
The finished photo can make these styles look almost effortless because the geometry does most of the visual work. What the photo rarely shows is how many points are pulling on the scalp, whether short perimeter hairs have been stretched into the pattern, or how easily you can cleanse and undo all those small sections later.
The strongest rubber band hairstyle is usually the one whose construction suits your hair as well as your preferred look. A dramatic grid can be worth the extra sectioning on healthy, manageable hair. A simpler front design makes more sense when quick takedown, scalp access, or gentle handling matters more.
One terminology note also matters: use elastics intended for hair rather than ordinary office rubber bands. Smooth, appropriate hair elastics are easier to work with and less likely to create unnecessary snagging during removal.
Graphic Sectioning That Still Leaves the Hair Free
Crisscross Crown Into a Puff
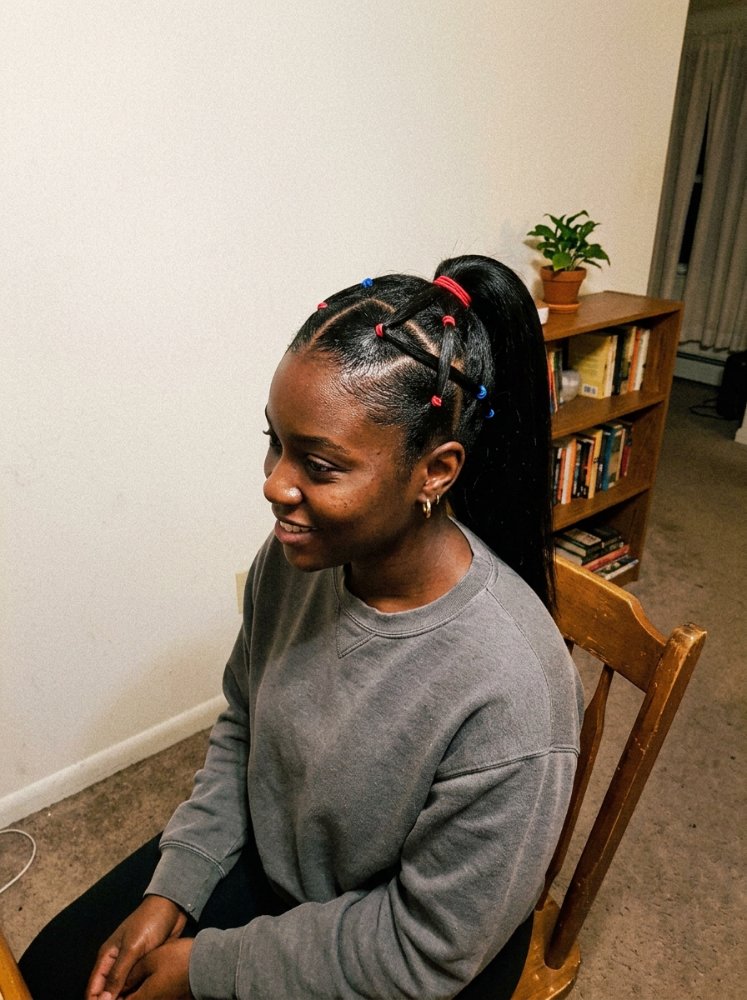
A crisscross crown gives you a lot of design without requiring the entire head to be divided into small sections. Hair near the front and crown is separated into panels, secured with elastics, then crossed toward neighboring sections before the remaining hair gathers into a puff.
This is one of the stronger choices for natural curls and coils because the puff keeps their volume visible. Shrinkage changes the apparent size and placement of that puff, so judge the style in the state you actually intend to wear. A stretched foundation gives a different silhouette from fully shrunken hair.
The crossing pattern already supplies plenty of detail. Keeping the number of sections moderate usually produces a cleaner result and makes removal less tedious than an extremely fine grid.
Front Elastic Grid With Loose Curls
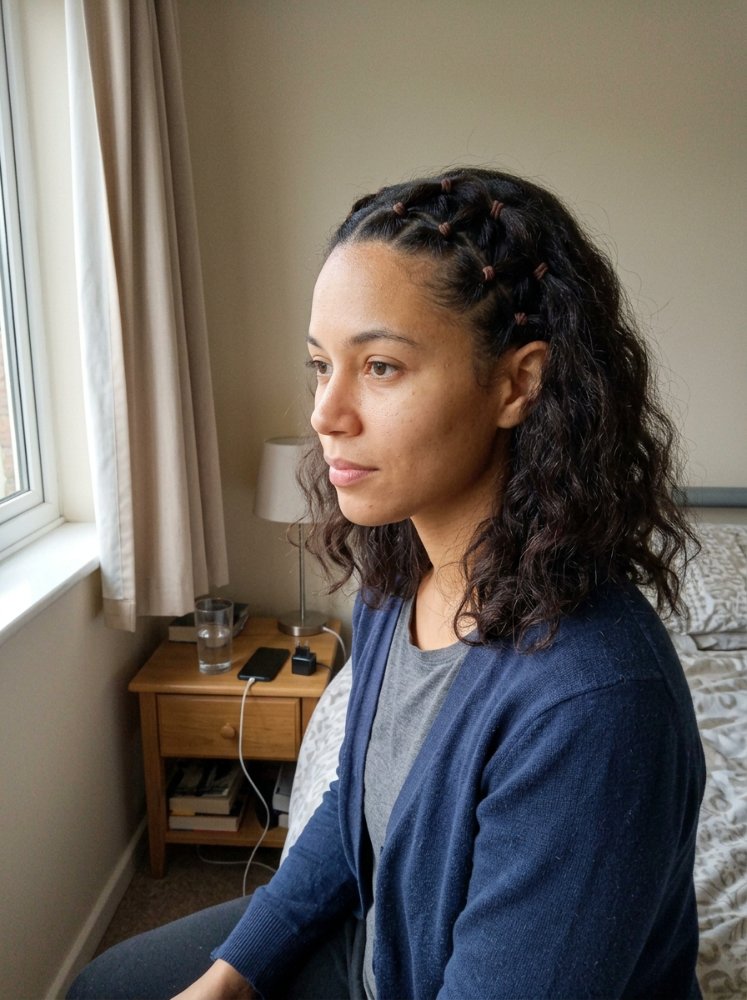
Keep the back and most of the sides loose, then build a connected elastic pattern across the front. The contrast between structured roots and free curls is what makes this version work.
It is especially useful when you want a rubber band hairstyle without committing the whole head to an updo. The loose portion can remain naturally curly, softly stretched, or styled in another compatible state. Plan that part first. A perfectly neat grid paired with a loose section that requires a completely different routine can turn a simple-looking style into more work than expected.
Diagonal Rubber Band Sections Into a Low Ponytail
Diagonal sectioning creates movement before the ponytail even begins. Instead of a square grid, each section travels backward at an angle and feeds visually toward a low anchor near the nape.
This gives straight, stretched, relaxed, wavy, or curly hair a more directional shape than a conventional slick ponytail. It also works well when you prefer the visual interest to sit around the head instead of high at the crown.
The low placement is practical around headrests and hats, although a substantial ponytail can still press against collars or the back of a seat.
Side Rubber Band Detail With the Rest of the Hair Loose
A small sectioned panel on one side can change the whole balance of loose hair. The elastics sit near the temple or above the ear while the remaining length stays free.
This is the understated option in the group. It works particularly well when full-head sectioning feels excessive or you want your natural wave, curl pattern, blowout, or straight length to remain the main feature. Keep glasses in mind: bulky sections directly above the ear can compete with the arms of the frames.
Connected Diamond Sections
Diamond-shaped panels create a more intricate surface pattern than basic rows because several sections meet at angled points. The design can cover the front half of the head or continue farther back before releasing into loose hair.
The geometry shows most clearly when the parts are visible, which means dense curls may need deliberate sectioning to prevent neighboring hair from obscuring the lines. That doesn’t require flattening all texture. The design only needs enough definition at the roots for the diamond pattern to read.
This is worth the extra work when the sectioning itself is meant to be the feature. For a casual style that will come down quickly, simpler shapes are more practical.
Puffs and Ponytails Built Around Elastic Sections
Rubber Band Mohawk Puffs
Instead of pulling everything to one central anchor, several ponytails or puffs run from the forehead toward the nape. Each section creates volume along the center of the head, producing a faux-hawk effect.
The style works especially well with curly and coily hair because texture builds the height naturally. Larger sections create broader puffs; smaller sections create a more segmented ridge. Density affects how full those puffs appear, while strand fineness is a separate characteristic and shouldn’t be treated as the same thing.
Sectioned Double Puffs
Two puffs become much more graphic once the front or sides are divided into connected elastic sections. The design can travel toward each puff from the center part, forming two distinct zones rather than one shared grid.
This is a playful shape with a practical advantage: the load is divided between two anchors. Comfort still depends on how firmly each section is secured and how much hair is gathered into it.
Leave short, delicate perimeter hairs out when stretching them into the elastic path creates unnecessary pulling.
High Puff With a Rubber Band Headband Effect
Several front sections can be connected from side to side so they resemble a built-in headband, while the remaining hair rises into a high puff.
The placement exposes the face and makes the front pattern easy to see. Natural shrinkage can make the puff sit closer to the head than it appears on stretched hair, while dense hair can create considerable fullness above the elastic design.
This is a stronger choice than an all-over grid when you want a clear rubber band detail but still need relatively easy access to most of the scalp.
Bubble Ponytail
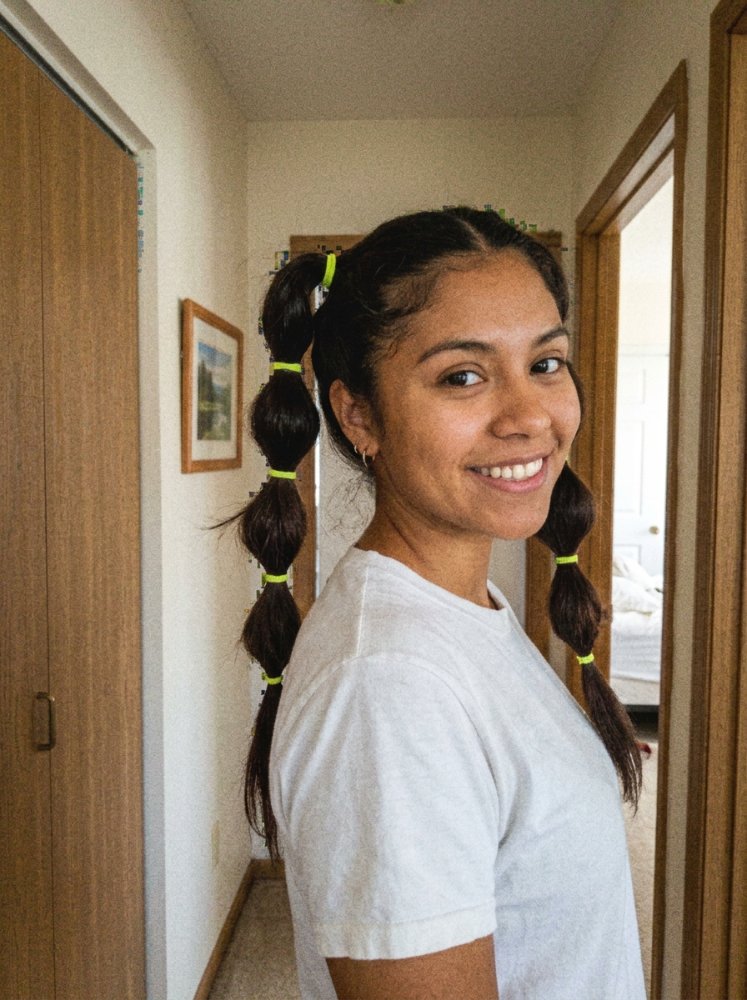
The bubble ponytail uses elastics down the length instead of concentrating the design at the scalp. Start with a regular ponytail, place additional elastics at intervals, and gently expand the hair between them to form rounded sections.
It works across several styling states, although the bubbles look different on smooth straight hair, textured natural hair, and braided or extension-supported lengths. The key visual feature is the repeated change in width.
A bubble ponytail is also one of the easiest ways to use the rubber band concept without creating many scalp anchors.
Multi-Ponytail Cascade
Several ponytails can be stacked vertically so each one feeds into the next. The upper section joins the section below, and the process continues toward the nape, giving the illusion of a more elaborate continuous style.
This construction is useful on medium lengths that resist staying inside one conventional ponytail. Instead of forcing every strand toward a distant anchor, each section only has to travel to the next connection point.
The visible effect can be sleek or textured, but the real advantage is structural. Shorter layers have somewhere to go.
Braids and Twists That Use Rubber Bands as a Foundation
Rubber Band Sections Into Box Braids
A rubber band can secure the base of each section before a braid begins, creating clearly separated boxes and a firm starting point.
That firmness deserves attention. An elastic base plus a braid adds two forms of hold to the same section, and added hair increases the load further. The strongest installation isn’t the one with the tightest foundation; it is the one that stays secure while the roots remain comfortable during normal movement.
This method also makes takedown more deliberate because each elastic must be removed without cutting or catching the hair underneath.
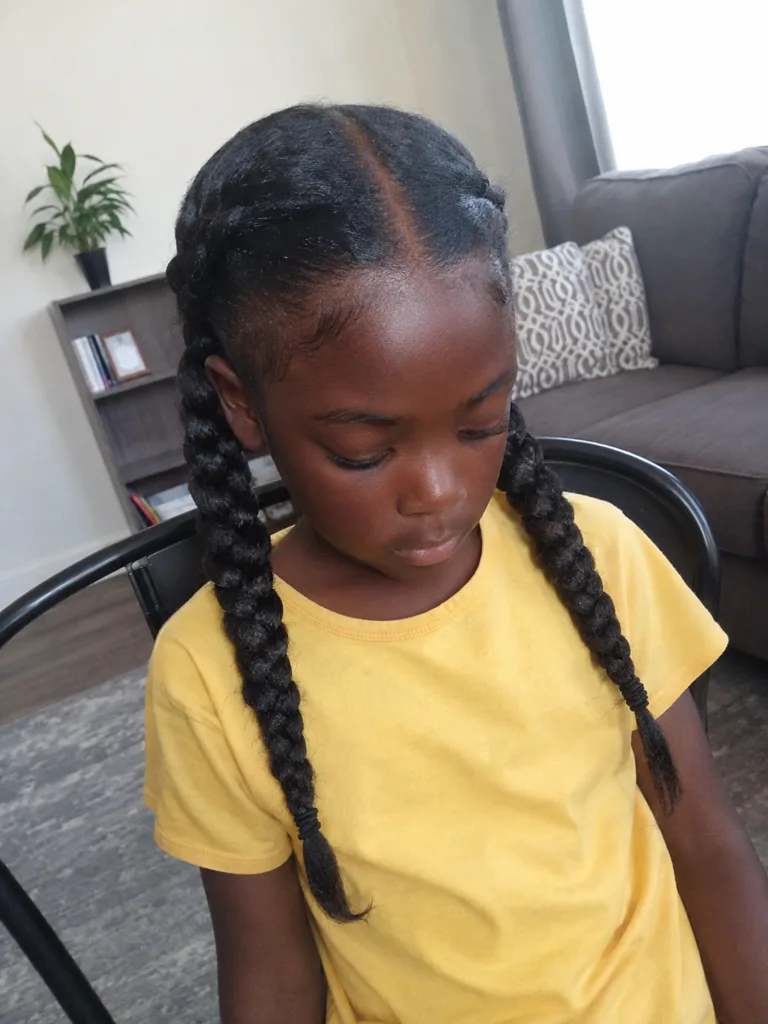
Crisscross Front With Two Braids
A detailed front panel paired with two longer braids creates a useful split between decoration and simplicity. The elastics handle the graphic work around the hairline and crown, while the back transitions into two substantial braids.
The two-braid finish is easier to reposition than a single high ponytail or bun and works well when you prefer the length to sit over the shoulders. It also gives the eye somewhere to follow: the crossed sections converge, then the larger braids continue that direction.
Rubber Band Sections Into Twists
Twists soften the finish compared with braids while keeping the root pattern visible. Individual elastic sections can feed into two-strand twists, or several sections can connect before a smaller number of twists begin.
Natural and stretched hair produce different twist behavior. A twist formed on shrunken coils tends to look more compact, while stretched hair shows more length. Neither state is inherently better; choose based on the result you want and the routine you actually use.
A modest number of larger twists is also less demanding at takedown than dozens of tiny elastic-and-twist combinations.
Front Rubber Band Design With a Single Braid
Here, the braid provides the long vertical line and the elastic pattern supplies detail around the scalp. Connected front sections travel backward until they meet a single braided ponytail.
This construction suits someone who likes intricate styling around the face but doesn’t want multiple braids hanging around the shoulders. The centered braid can be worn down the back or moved to one side.
Very long or dense added hair changes how much the central anchor moves during walking, exercise, and head turning, so dramatic length is worth choosing only when that physical behavior suits your routine.
Updos and Statement Shapes
Rubber Band Sections Into a High Bun
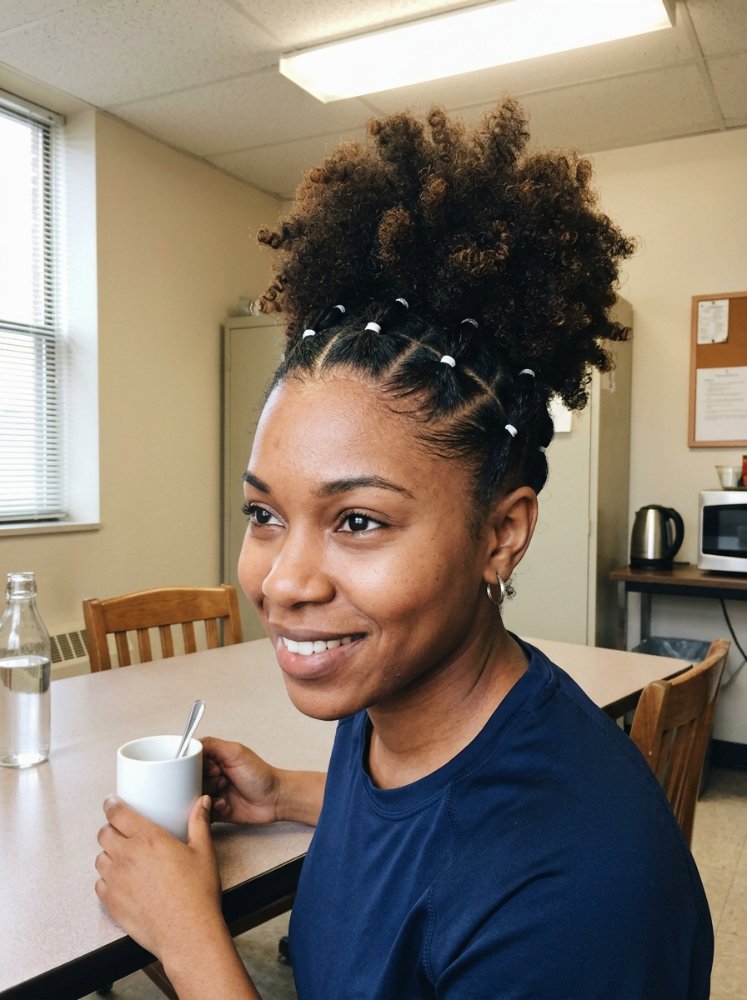
A high bun becomes more architectural when several front and side sections visibly feed toward it. Straight lines make the result cleaner; curved or angled sections add more movement.
High placement puts the bun where it is easy to see, but it also puts it exactly where a car seat, airplane headrest, or firm chair back may become annoying. A flatter or moderately sized bun is the more practical choice for a long day involving a lot of sitting.
Keep the section tension independent from the bun tension. Tightening every small elastic because the final bun feels loose only spreads extra pulling across the scalp.
Low Bun With Geometric Side Sections
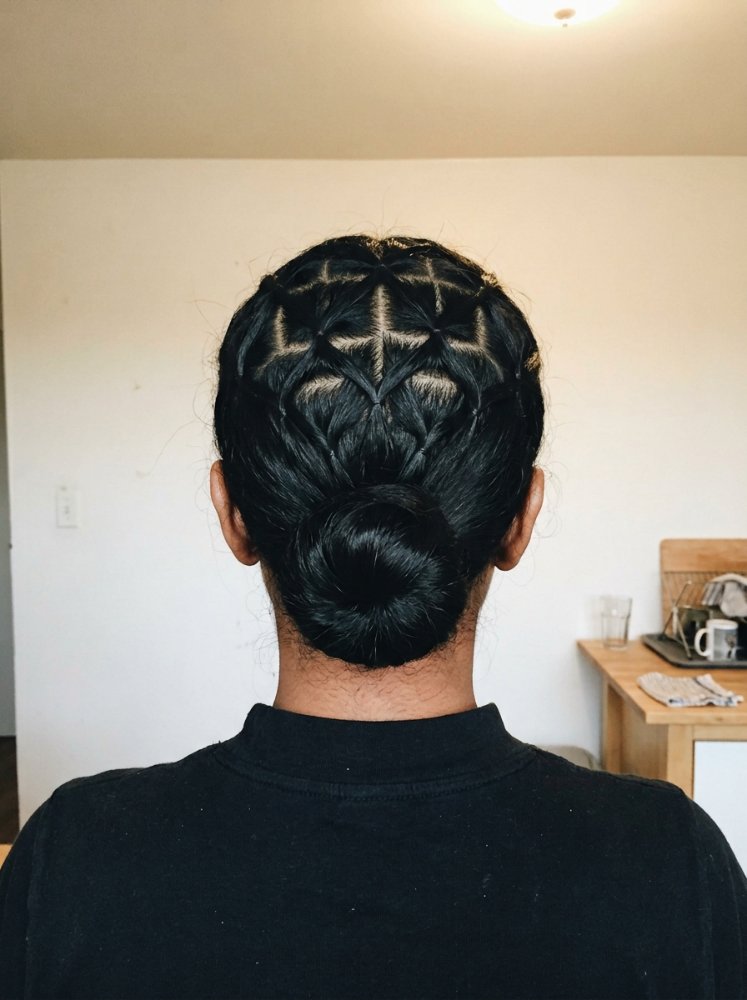
A low bun lets the rubber band design carry the visual interest while keeping the bulk closer to the nape. Sections can angle from the temples and sides toward the bun, creating a wrapped or woven appearance before the hair gathers.
This is an underrated option for a formal finish because the design is visible from multiple angles without requiring substantial crown height. The lower position also works more comfortably with some headwear, though a thick bun can still rub against high collars.
Faux Hawk With Linked Rubber Band Sections
The faux hawk version uses linked sections to pull the sides inward while leaving volume through the center. Unlike the separate puff mohawk, this style can create one continuous textured ridge from front to back.
Curls, coils, twists, or tucked lengths can form the center. The sides determine whether the look reads sleek and dramatic or softer and fuller.
Because many sections may travel inward toward the same central zone, this is one design where construction matters more than adding extra detail. Strong lines are enough. Tiny perimeter sections rarely improve the overall shape enough to justify the added handling.
Half-Up Rubber Band Crown
A half-up crown combines connected sections across the top of the head with loose length underneath. The gathered portion can finish as a small ponytail, puff, bun, braid, or twist, while the lower hair remains down.
It is one of the most adaptable rubber band hairstyles because the style still works when you want movement around the shoulders. It also lets you preserve fullness in the lower half instead of directing every strand toward one anchor.
The loose hair will determine much of the daily effort. A half-up design worn over natural curls needs a different refresh routine from the same construction over pressed or straightened hair.
What Changes the Result on Different Hair
Rubber band hairstyles depend heavily on the state of the hair before the first section is secured. Natural, stretched, pressed, relaxed, straight, wavy, and curly hair won’t produce identical lines or volume.
Shrinkage changes both section appearance and the position of puffs, ponytails, and twists. A style copied from a photograph of stretched coils can sit noticeably shorter when recreated on fully shrunken hair.
Density affects how much hair fills each panel and how substantial the free sections appear. Fine strands describe strand diameter, not the number of hairs on the scalp. Low-density hair may show more scalp between sections, particularly when the grid is very small. Larger panels can sometimes create a stronger overall result than dividing limited density into many tiny sections.
Hair condition matters too. Areas already dealing with breakage shouldn’t be forced into a complicated pattern simply to keep every part perfectly symmetrical. Uneven hair lengths can often be accommodated by changing the section path or allowing shorter hairs to remain free.
Tension, Removal, and Scalp Access
Most problems with rubber band hairstyles begin when visual neatness becomes more important than comfort.
The elastics should secure the section without creating persistent pulling, stinging, or soreness. Multiple connections can amplify tension because one section may be pulled once at its own base and again when it joins another section. High ponytails and heavy added hair introduce another source of force.
Small perimeter hairs deserve particular restraint. They don’t need to be captured simply because the reference photo has an extremely clean hairline.
Removal is equally important. Don’t yank an elastic through textured or tangled hair. Work deliberately so the band can be released without snapping strands around it. Complicated grids take longer to undo because every junction has to be separated before the hair can be fully detangled.
Scalp access also gets harder as the number of connected sections rises. Buildup, sweat, and normal cleansing needs don’t disappear because the hairstyle looks neat. Choose a pattern that lets you care for the scalp and dry the roots appropriately for your hair and routine.
Persistent pain, sores, redness, irritation, sudden shedding, or a concerning change in density deserves more attention than another styling adjustment. Remove or loosen the source of pulling and consider speaking with a dermatologist or another qualified healthcare professional when symptoms persist or concern you.
Choosing a Rubber Band Hairstyle You Will Actually Want to Wear
Start with the part of the hairstyle you care about most.
Choose a front grid with loose hair when your curls, waves, or length should remain the main attraction. Pick a crisscross puff when you want graphic sectioning and natural volume in the same style. A low sectioned ponytail or bun is the stronger everyday choice when high bulk would interfere with seating, headwear, or your normal movement.
A bubble ponytail makes sense when you like the elastic look but don’t want a large number of scalp sections. Box braids or twists on elastic bases create more structured roots, although they also make installation and removal more involved. Faux hawks and linked geometric patterns are worth the extra work when the scalp design is genuinely part of the occasion.
Before styling, look at the reference image as construction rather than decoration. Where does each section begin? Does it connect to another elastic? Where does all the hair eventually gather? How much of the apparent fullness comes from natural density, styling state, or added hair?
Those answers matter more than copying every tiny part exactly.
For a salon or braiding appointment, bring photographs that show both the front and back when possible. Discuss the section size, the final anchor position, whether added hair will be used, and any areas you prefer to leave out of tight styling. A strong reference photo communicates the design; a good consultation translates that design to the hair actually being styled.
Related Hairstyles to Explore
- Hair Inspo Aesthetic
- Dimensional Brunette for women
- Slick Baddie Hairstyles
- Baddie Hairstyles Natural Hair
FAQs
Can you do rubber band hairstyles on short hair?
Yes, provided there is enough length in the chosen areas to secure the sections without excessive pulling. Short hair often works especially well with a partial front or side design because the rest of the hair doesn’t need to reach a distant ponytail or bun. Forcing very short perimeter pieces into a faraway anchor usually creates more trouble than the extra neatness is worth.
Are rubber band hairstyles suitable for natural curly or coily hair?
They can work very well on curls and coils. Decide whether you want to style the hair shrunken, stretched, or in another state before copying a reference image, because shrinkage changes section size, length, and volume. Detangling the areas being sectioned also makes it easier to remove the elastics later without catching strands.
Can extensions be added to rubber band hairstyles?
Yes. Extensions may be incorporated into ponytails, braids, twists, buns, and other finishes. The attachment method and amount of added hair affect weight and movement, especially when everything gathers at one anchor. More length isn’t always more useful; moderate added volume is often easier to wear when the hairstyle already contains many scalp sections.
How do you keep a rubber band hairstyle neat without making it too tight?
Clean parting, controlled section sizes, and secure elastics create most of the neatness. Tightening every section is unnecessary. Smooth the hair going into each elastic, keep the band secure enough to hold the section, and check how the style feels as sections begin connecting. Comfort during normal head movement is a better test than how immovable the hairstyle feels.
Hair Texture & Upkeep Style Matcher
Select your natural hair texture and daily maintenance window to get an instant styling formula and heat safety cap.
Heat Cap: 320°F (160°C)
A versatile three-strand braid beginning at the parietal ridge, securing the top half while allowing natural wave texture to flow freely around the shoulders.
Conclusion
Rubber band hairstyles are most successful when the elastic pattern has a clear purpose. Use it to direct hair toward a puff, organize shorter lengths, create a graphic crown, or support a braid or updo—not simply to add more sections.
For most people, a moderate number of well-placed sections gives a stronger balance of detail, comfort, scalp access, and manageable takedown than the most intricate grid available. Choose the final puff, ponytail, braid, bun, or loose texture first, then build the rubber band design around the way that hairstyle needs to move.
Editorial Standards & Hair Health Guidance
Every style featured on Tress Atlas is curated with a focus on real-world wearability, scalp tension management, and cuticle preservation. When trying protective styles or tight updos, ensure perimeter hairline sections remain tension-free to avoid traction stress on delicate follicles. For heat styling, cap tools below 350°F (180°C) to prevent thermal keratin denaturation.
Scientific Sourcing: Practices aligned with the American Academy of Dermatology (AAD) on traction alopecia risk reduction and cosmetic trichology research on hair tensile strength.