Medieval Hairstyles: Complete Styling & Technique Guide
A medieval hairstyle can mean very different things. One reader wants something believable for historical dress; another wants a romantic braid for a Renaissance fair, wedding, costume, or fantasy event. Those two goals shouldn’t lead to the same hairstyle.
Medieval Europe covered many centuries, regions, and social customs, so there was never one universal medieval hair look. Hair might be braided, coiled, covered, netted, wrapped, or partly concealed beneath elaborate headwear. Modern interpretations also tend to expose far more hair than some historical styles would have.
The most useful decision is how historical you want the result to feel. Braids placed close to the head, compact coils, center parts, nets, veils, and covered constructions usually read more historical. Loose curls, oversized crowns, deliberately undone braids, and dramatic accessories move the look toward modern medieval fantasy.
Hair length matters too. Long hair provides material for wrapped braids and large coils, but many of the same shapes can be created on medium hair through smaller sections, discreet pinning, or carefully matched added hair.
Braids That Create a Strong Medieval Shape
Long Center-Parted Braid
One long braid is the simplest option here, but the placement keeps it from looking like an ordinary everyday plait. Start with a clean center part, keep the hair close to the head around the crown, and let the braid begin low at the back. A ribbon or narrow cord can finish the end without overwhelming the construction.
This is a strong choice when comfort matters. There are no large coils pressing against a headrest, and the braid can be moved over one shoulder while sitting.
The style also works with naturally straight, wavy, curly, or coily hair. A highly smoothed surface creates one interpretation; allowing natural texture to remain visible gives the braid more dimension. Hair doesn’t need to be pressed straight to achieve the structure.
Paired Braids Behind the Ears
Two braids beginning behind or slightly above the ears create a distinctly different outline from a single back braid. Keep the upper hair relatively flat and allow the two braids to hang separately down the back or toward the chest.
This construction is especially useful with heavy or very long hair because the length is divided between two sections. Each braid becomes easier to reposition around collars, cloaks, and costume necklines.
It also gives you several styling possibilities later in the day: the braids can remain loose, cross at the nape, or become the foundation for a pinned style.
Full Braided Crown
A braided crown carries the hair around the head instead of concentrating everything at the back. The result feels ceremonial and immediately recognizable, yet it can still remain fairly restrained.
Long natural hair can be braided and wrapped around the head, while shorter lengths may suit two braids that are crossed and pinned to imitate one continuous crown. The joining point deserves attention; a bulky overlap can make one side noticeably thicker.
This is one of the stronger choices for a medieval-themed wedding or formal event where you want the hairstyle itself to remain visible. Add a veil only after checking how its attachment interacts with the braid.
Crossed Nape Braids
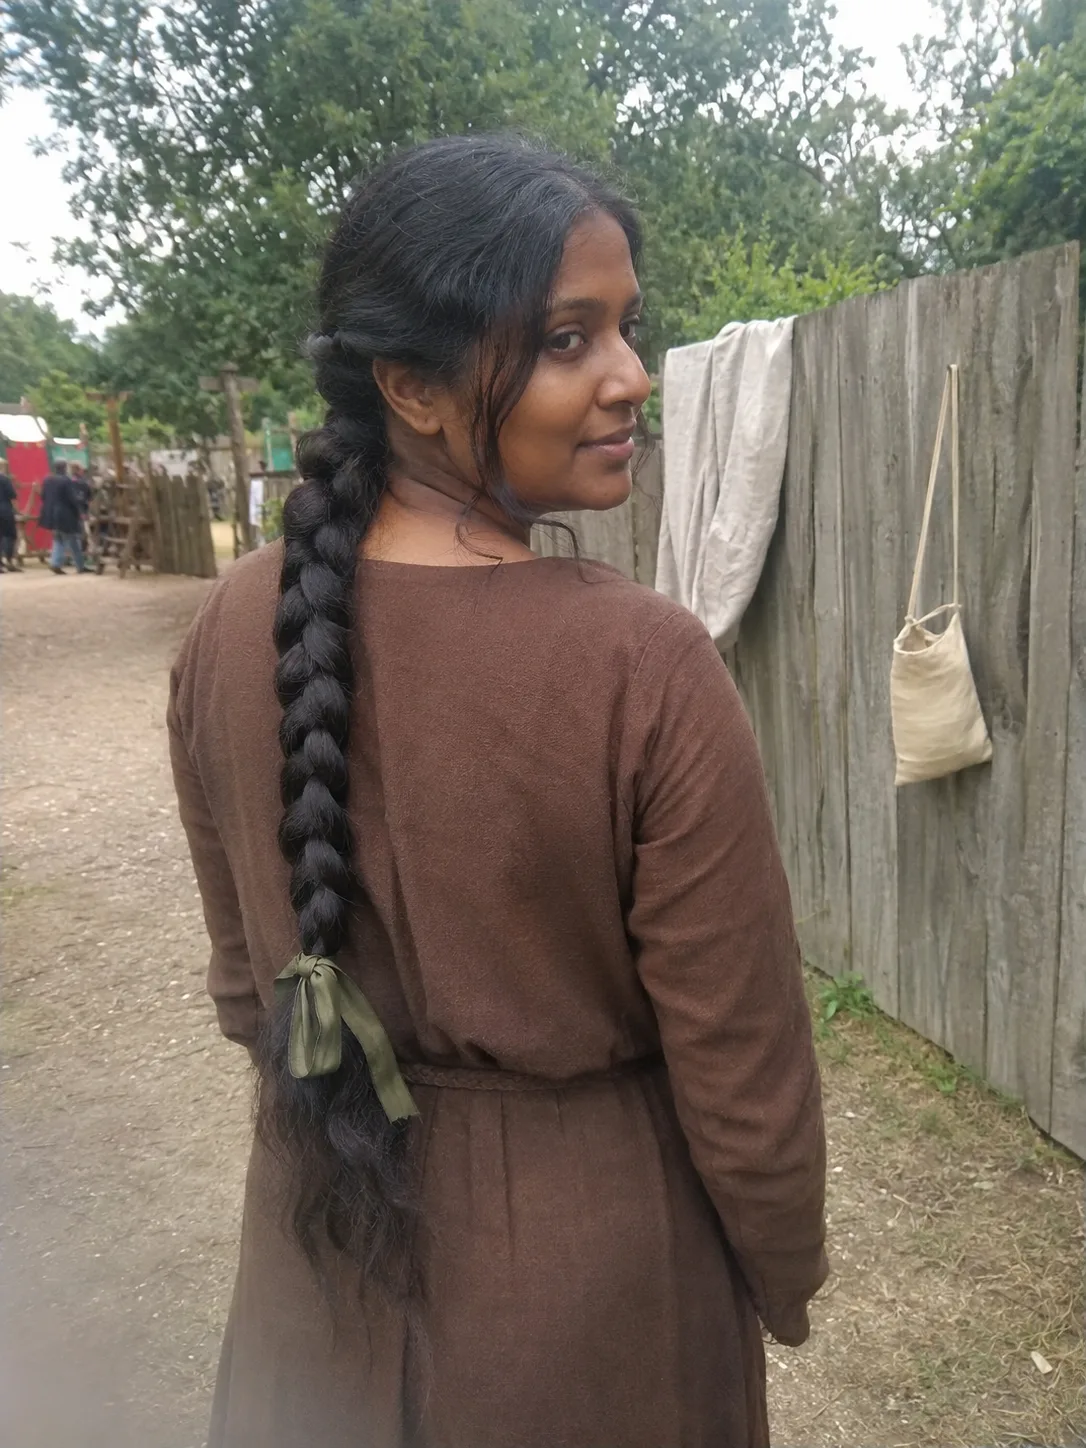
Two low braids are crossed horizontally across the back of the head and pinned with their ends hidden beneath the opposite side. Compared with a full crown, the emphasis sits much lower.
That lower construction works well beneath many veils because the top and sides of the head remain relatively smooth. It also avoids creating a thick ridge exactly where a circlet may sit.
The style becomes particularly attractive on hair with visible texture because the crossed sections create depth without needing extreme volume.
Ribbon-Woven Braid
A ribbon running through a braid adds color without changing the basic shape of the hairstyle. Choose one long braid, two side braids, or a crown construction and weave the ribbon as part of the braid rather than tying multiple decorative bows over the surface.
The cleaner approach usually looks more convincing for medieval-inspired styling. Too many exposed clips, pearls, flowers, and ribbons can quickly turn a simple historical reference into a generic festival braid.
A contrasting ribbon emphasizes every turn of the braid. A close tonal match gives a quieter result.
Coils and Pinned Shapes for a More Structured Look
Low Coiled Braid
Start with a single braid at the nape and wind it into a flat coil. Because the braid provides its own structure, the finished bun has more visible pattern than a smooth chignon.
It’s an underrated medieval hairstyle for long, dense hair. Instead of leaving the entire length swinging freely, the hair sits compactly at the back. Pin around the outside of the coil and through stable sections of the braid rather than relying on one heavily loaded point.
This shape also works beneath some nets and veils, making it useful when the hairstyle is primarily a foundation for headwear.
Double Side Coils
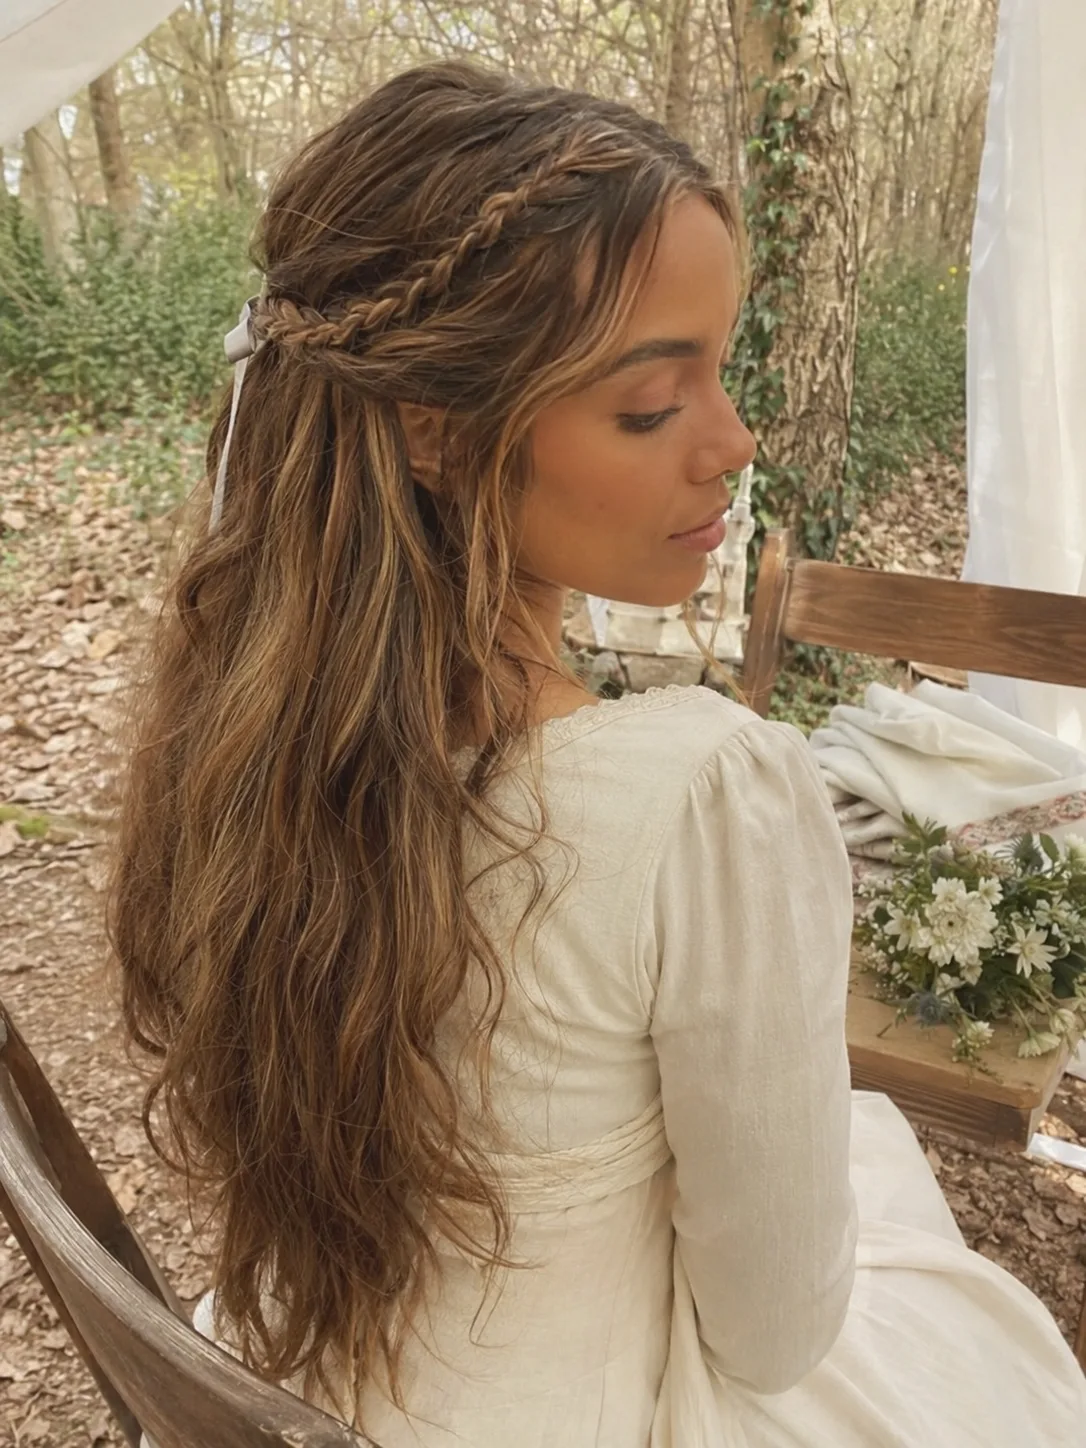
Hair divided into two sections can be braided or twisted and wound into matching coils near the sides of the head. Placement changes the character dramatically: lower coils feel restrained, while large coils positioned closer to the temples create a much more theatrical profile.
Think about what will be worn over them before building the style. A veil, net, padded headdress, or circlet may need the coils to sit in a precise location.
Large side structures also extend beyond the natural width of the head, so check how they feel around glasses arms, earrings, and fitted head coverings before an event.
Wrapped Side Braids
Instead of making complete circular coils, braid two side sections and curve them backward, fastening each braid along the side and rear of the head. The visible lines travel horizontally rather than hanging vertically.
This is useful when you like the detail of braided side coils but want a flatter profile. It requires enough length for the braid to travel, though it doesn’t demand the very long hair needed for an oversized crown.
Leaving the crown controlled keeps the braid direction easy to read.
Compact Nape Roll
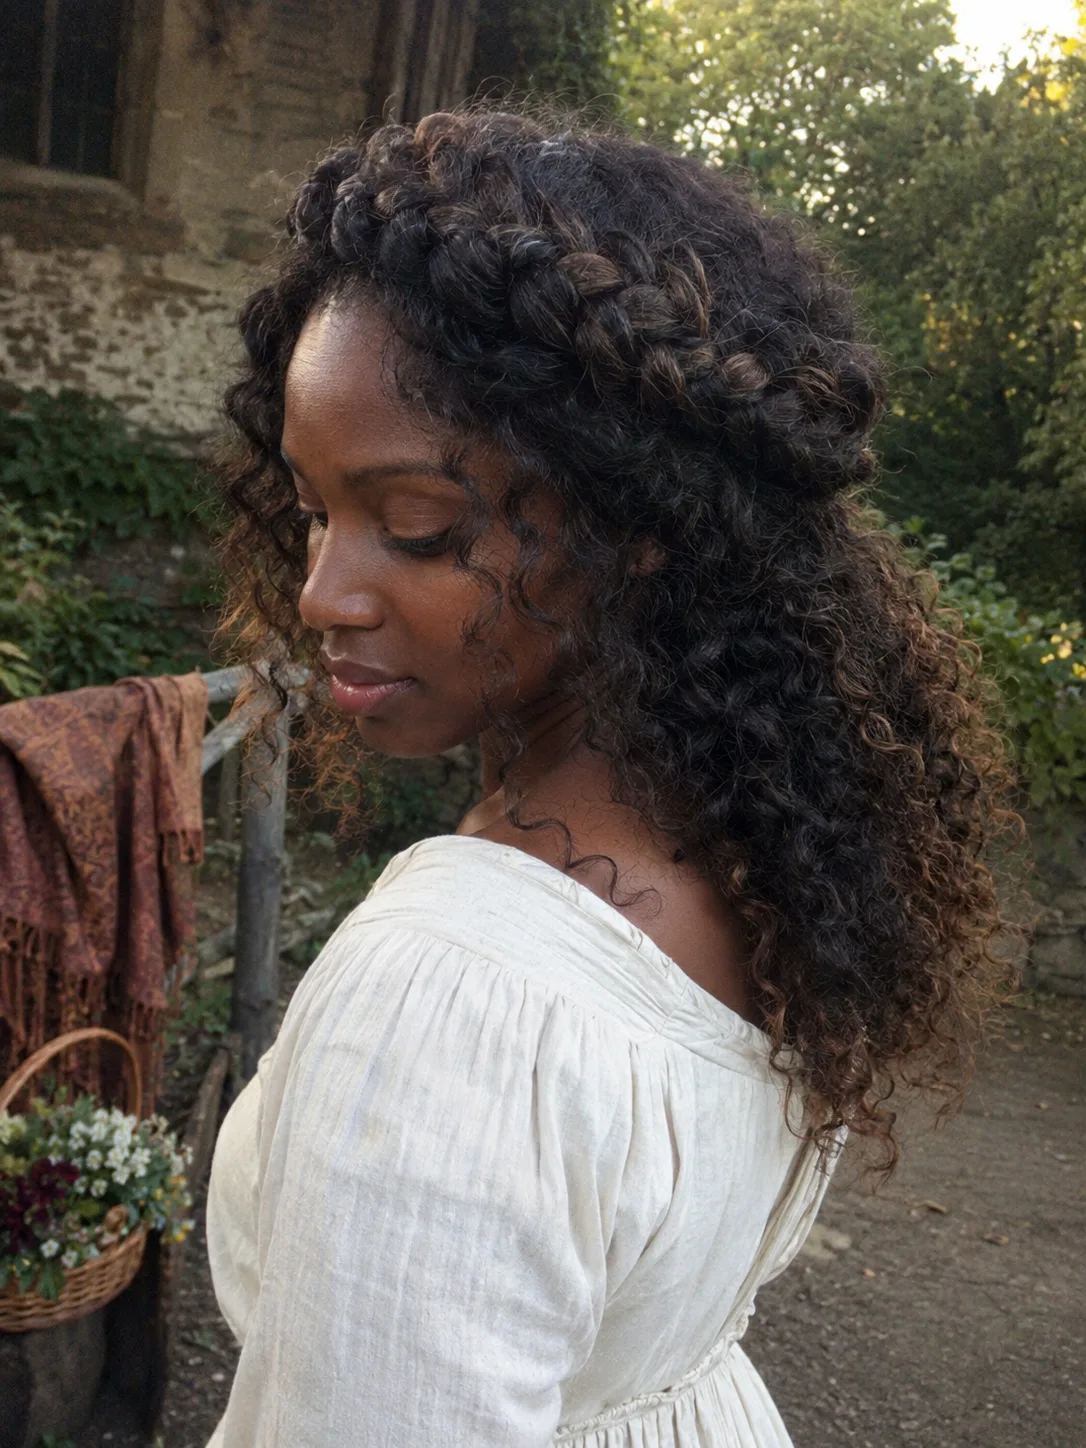
A nape roll provides a medieval-inspired alternative for hair that isn’t long enough to create substantial wrapped braids. The hair is gathered low and rolled inward, with the ends secured inside the shape.
The cleaner the roll, the more it behaves like a base for a veil or decorative band. More visible wave or curl softens the interpretation.
This style is particularly practical for an outfit with elaborate sleeves, jewelry, or headwear because the hairstyle isn’t competing for the same visual attention.
Braided Nape Knot
A braided knot sits between a plain coil and a more elaborate updo. The braid is folded and tucked rather than wound into a perfect circle, creating a compact interlaced appearance at the nape.
Medium-to-long hair is usually easier to control here than extremely long hair, which creates more material to conceal. Very long braids can be folded more than once, but that produces additional thickness.
The knot is a good base for a light veil because it provides somewhere for pins to sit without requiring a high bun.
Medieval Hairstyles Built Around Veils, Nets, and Coverings
Center-Parted Hair Beneath a Simple Veil
Sometimes the head covering is the hairstyle.
A precise center part with hair smoothed or arranged close to the head creates a quiet foundation beneath a veil. The remaining length can be braided, coiled, or secured low where it won’t distort the fabric.
This approach feels markedly different from attaching a veil to a modern curled updo. Much of the visible effect comes from the line of the covering and the framing around the forehead.
Check the veil from the side as well as the front. A hidden bun that’s too large can create an unintended bump beneath lightweight fabric.
Braids Beneath a Veil
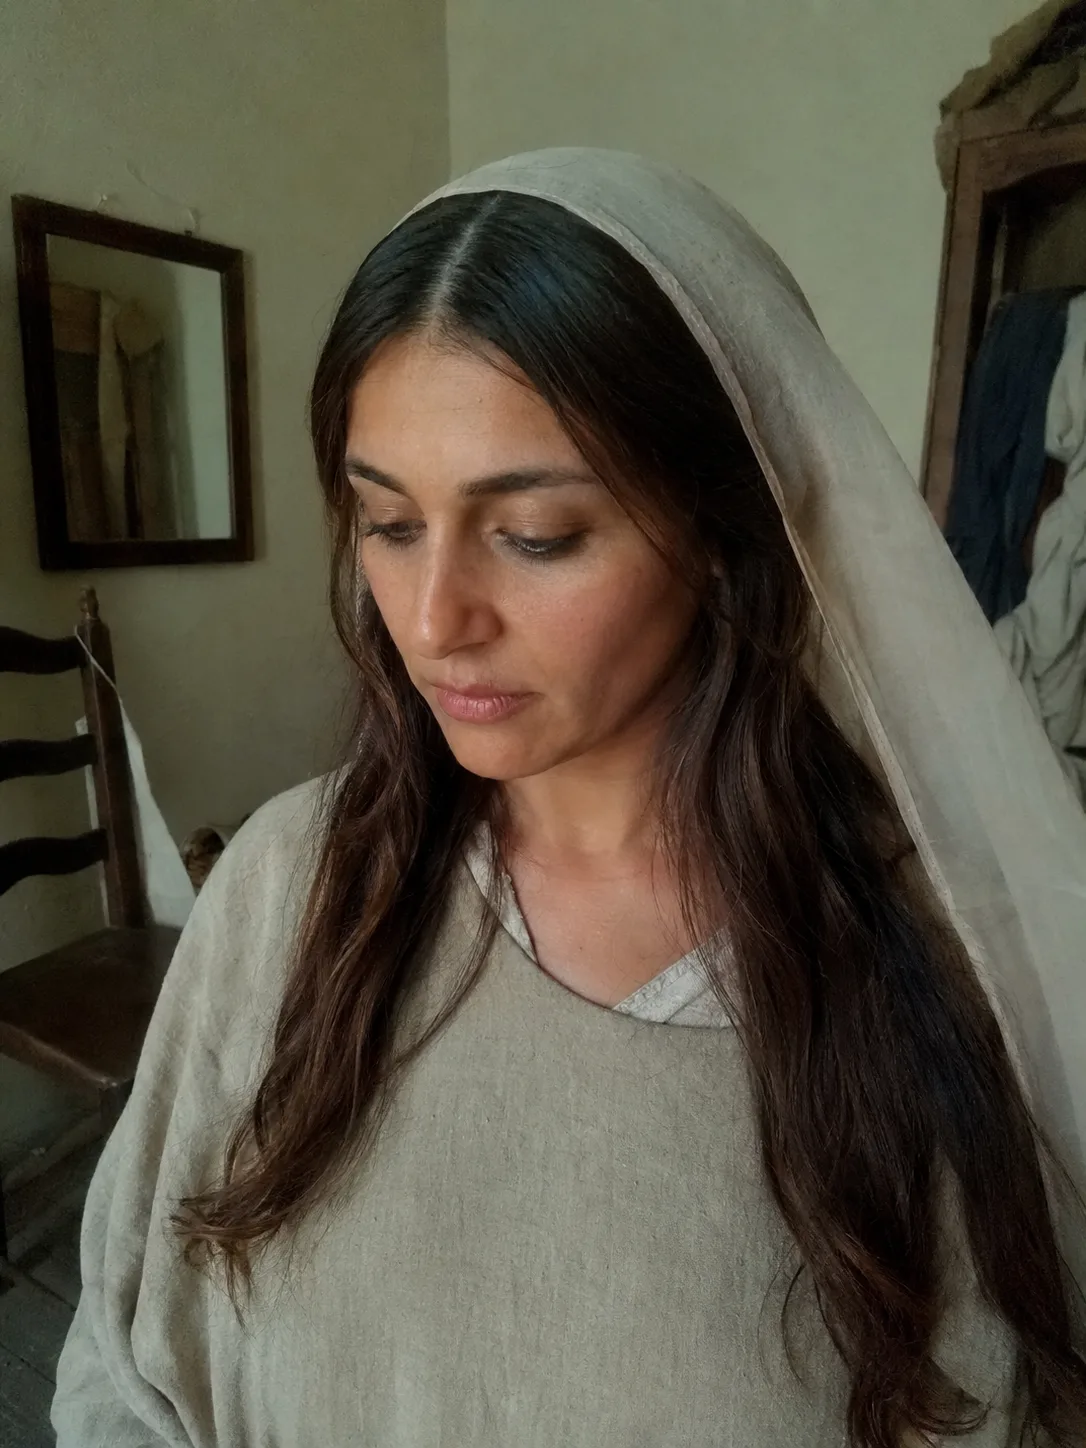
Rather than concealing loose hair, build one or two braids first and then arrange the veil over the finished structure. The braids help contain the length and can create subtle volume beneath the fabric.
This is more practical than leaving very long hair loose under a covering, particularly during an event involving outdoor movement. Loose lengths can bunch at the neckline or become trapped beneath costume layers.
Keep the braid placement compatible with the veil attachment instead of finishing the hairstyle and trying to force the headwear over it afterward.
Netted Side Coils
A decorative hair net changes the appearance of side coils by containing their surface and emphasizing the rounded outline. It can also help keep small flyaways visually contained without turning the hair into a rigidly smoothed style.
This is worth choosing when the costume already has a strong late-medieval influence. The net becomes part of the overall head shape, not a last-minute accessory.
Hair texture still matters. Dense curls or coils may create a fuller foundation than stretched or fine hair, so build the coil size according to the actual volume available rather than copying the exact dimensions of a reference photo.
Low Hair Under a Wrapped Head Covering
A wrapped covering or wimple-inspired arrangement places even more attention on the fabric surrounding the head, neck, or lower face. The underlying hair usually works best when it stays compact.
Low braids, a small nape coil, or a controlled roll make more sense here than a high modern bun. Excess height can distort the way the covering falls.
For a costume-focused look, this is one of the more useful options because the hair supports the clothing instead of competing with it.
Braided Base With a Draped Veil
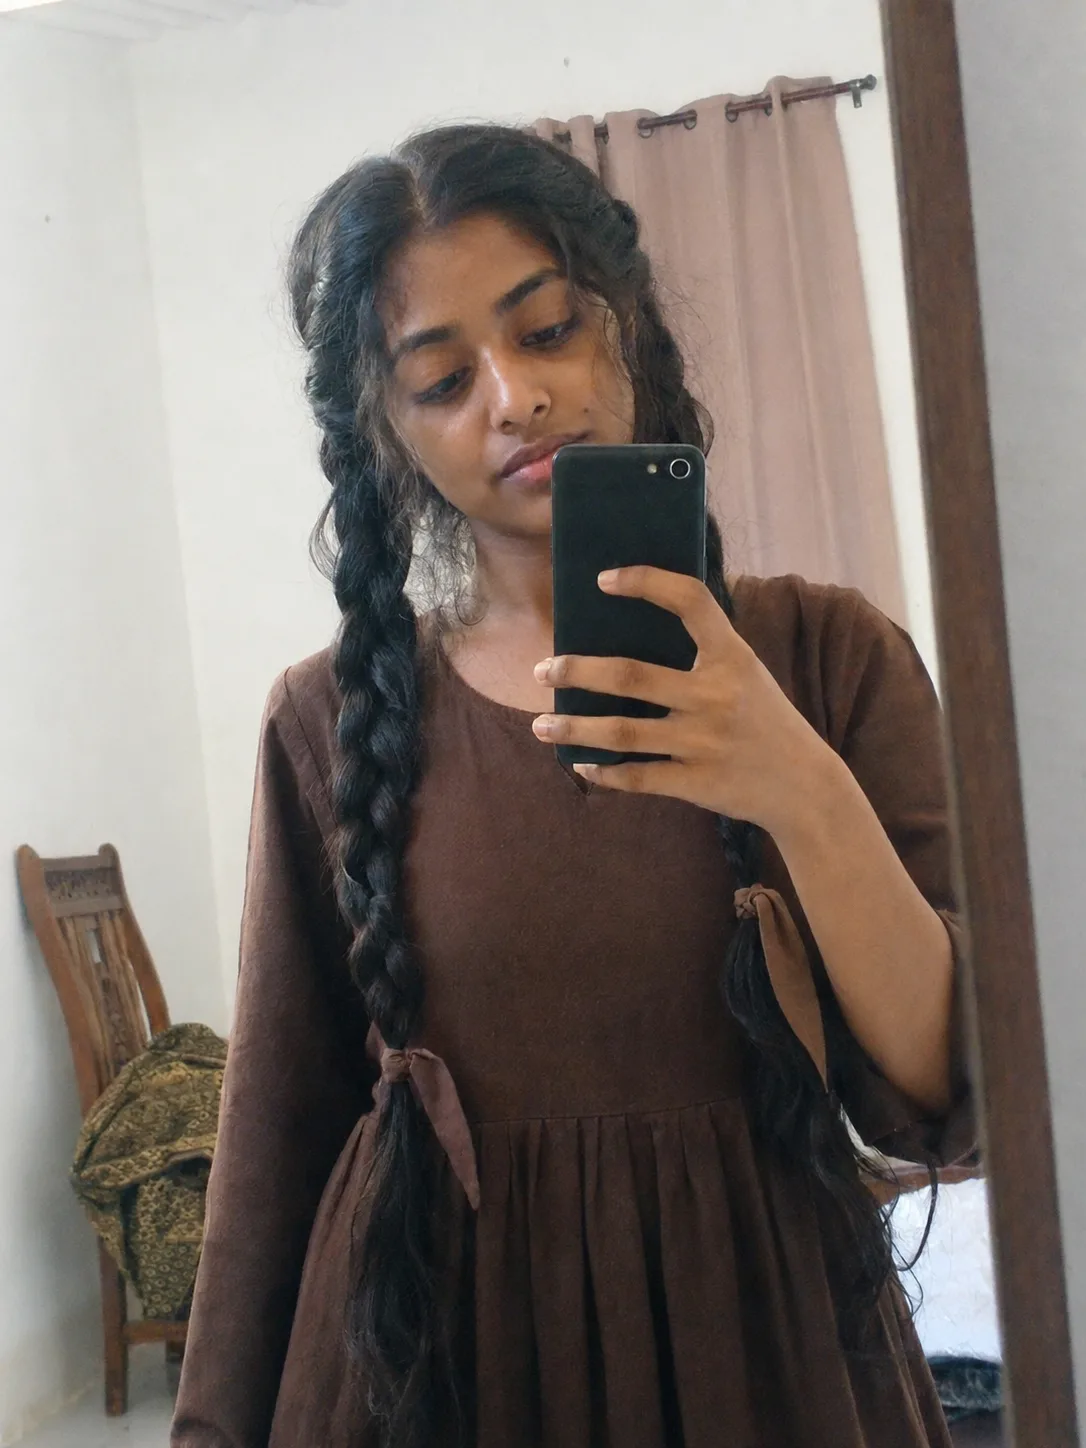
Here the braid remains partly visible while the veil hangs from a stable point behind or above it. A crown braid, crossed nape braids, or a compact braided bun can all create that foundation.
The hairstyle needs to be tested with the actual veil. Fabric weight and attachment method change how much support is required, and decorative combs can flatten a braid if they’re inserted directly through its most visible section.
This is a better formal-event choice than improvising the veil placement after the hair has been completely finished.
Softer Medieval-Inspired Hairstyles
Long Center-Parted Waves With a Circlet
Loose hair with a center part and a narrow circlet gives the familiar romantic medieval-princess effect. It is one of the least historically specific options in the article, but it’s extremely useful when the goal is atmosphere rather than strict reconstruction.
The main challenge is proportion. Large modern curls, heavy crown teasing, and highly sculpted front pieces can pull the style toward contemporary formal hair. Softer waves and a flatter crown preserve more of the medieval-inspired character.
Long hair makes the visual reference obvious, though medium lengths can work just as well with the right costume.
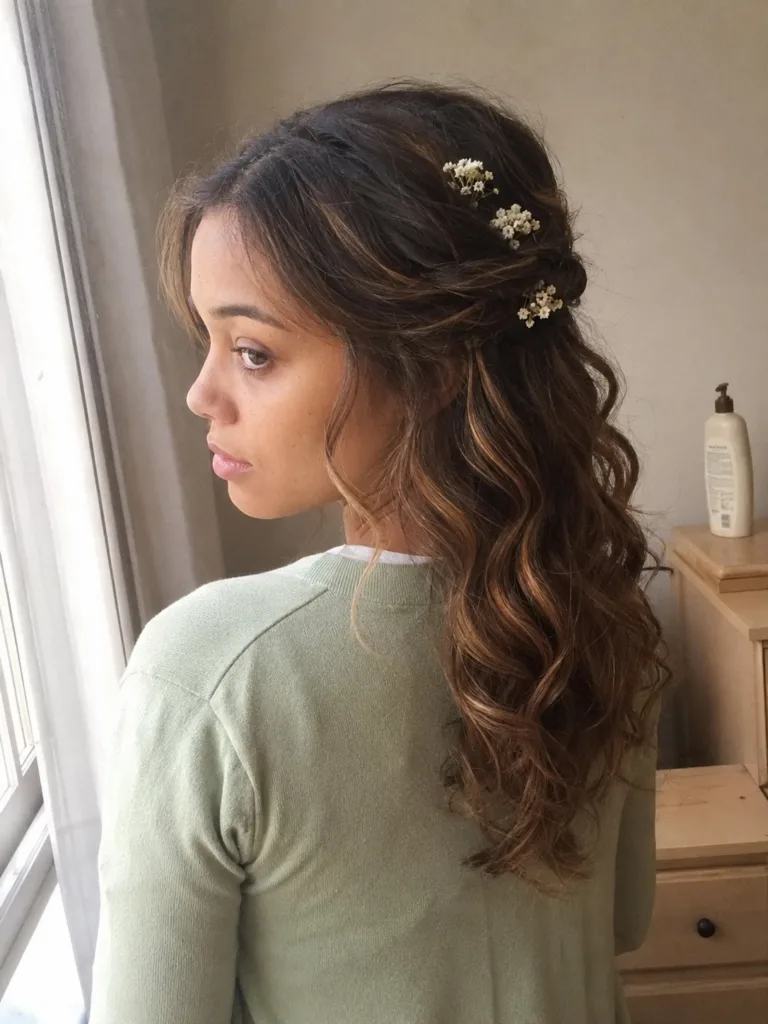
Half-Up Twisted Crown
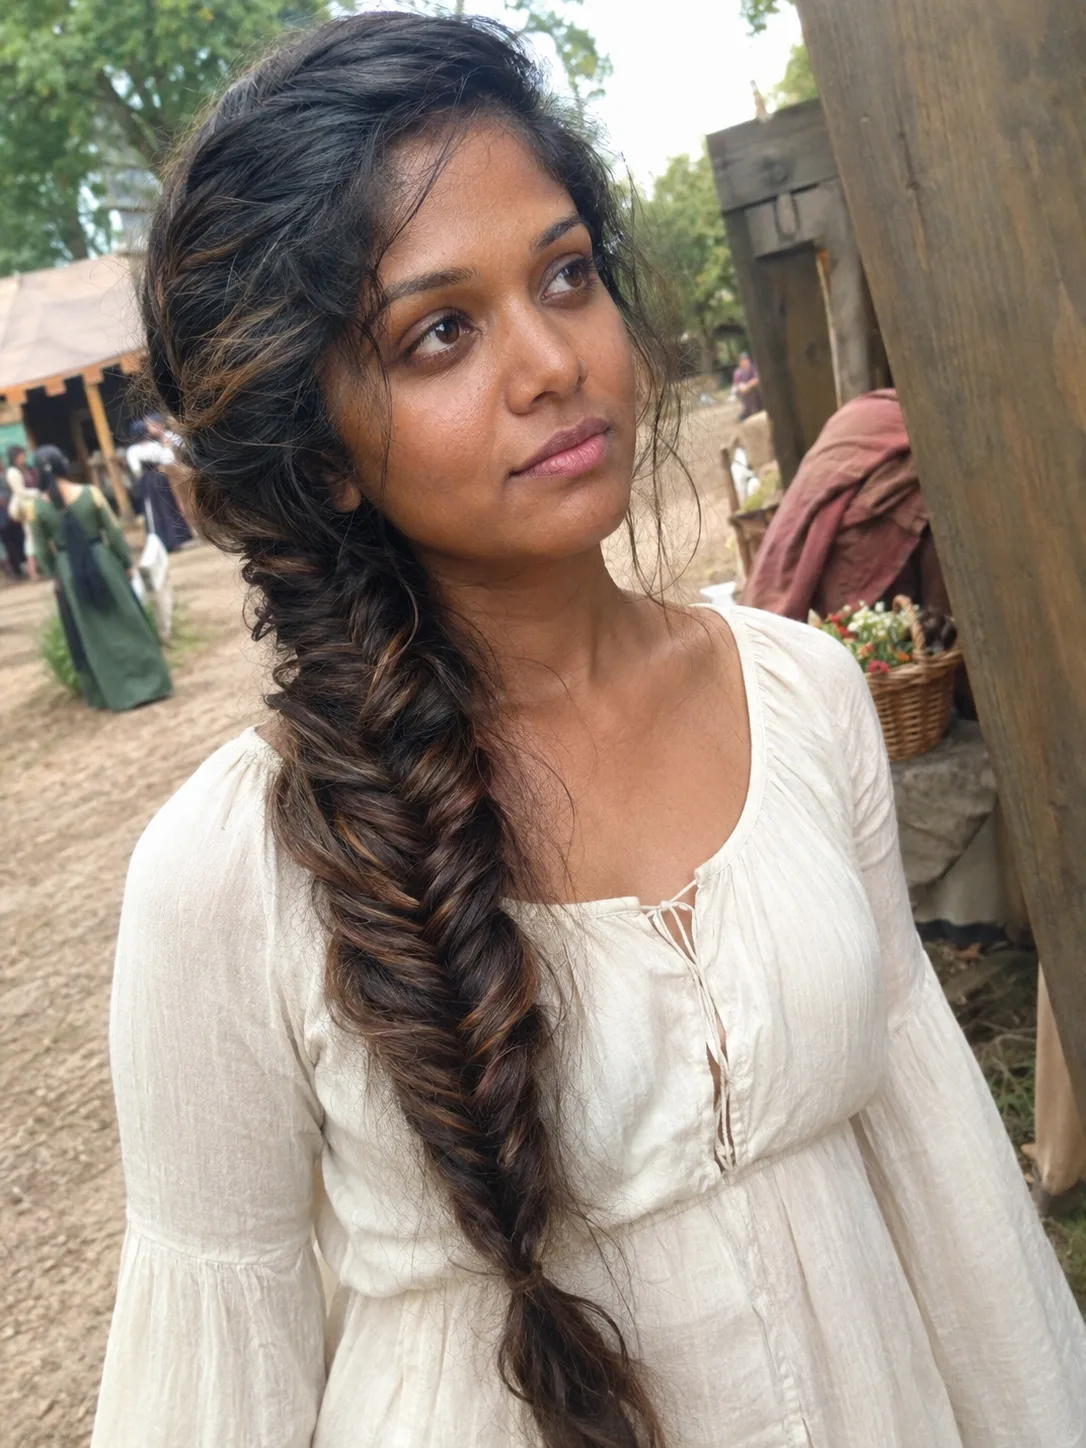
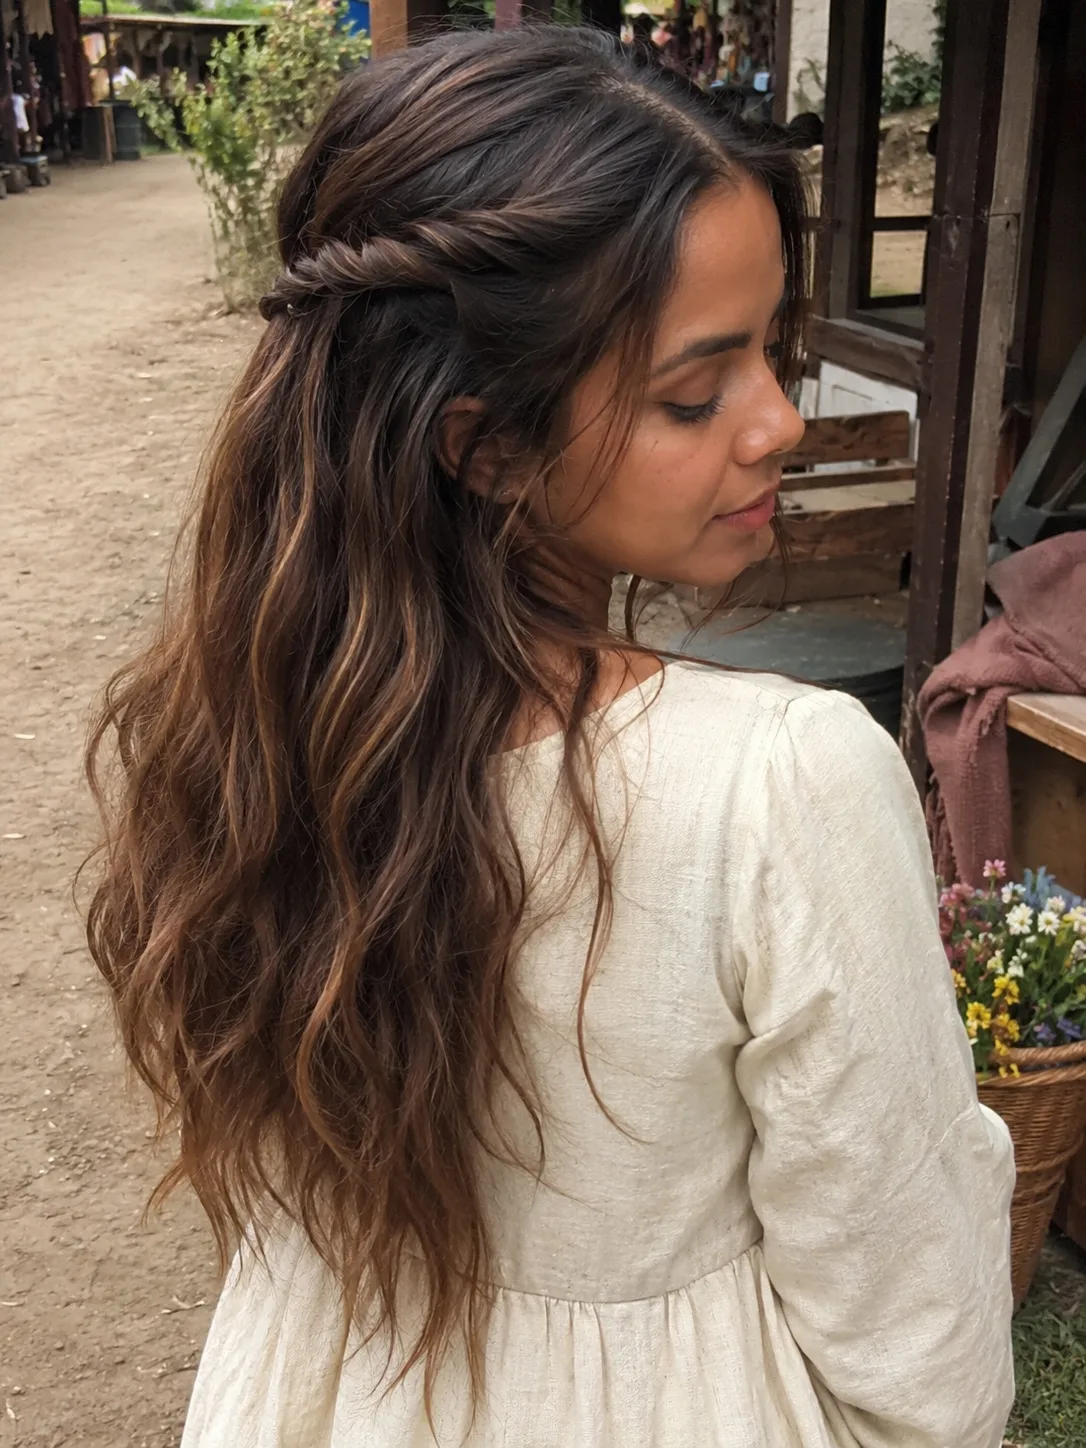
Two sections from around the temples are twisted backward and joined at the rear, leaving most of the length loose. It gives you an open neckline and visible hair while keeping the front sections away from the face.
This is one of the easiest options for a wedding guest, fair, themed dinner, or costume where you don’t need strict historical accuracy. The construction is also forgiving on naturally wavy or curly hair because texture makes the twists more visible.
Avoid overcomplicating the back with multiple tiny twists. One clear line generally reads better from a distance.
Half-Up Braided Band
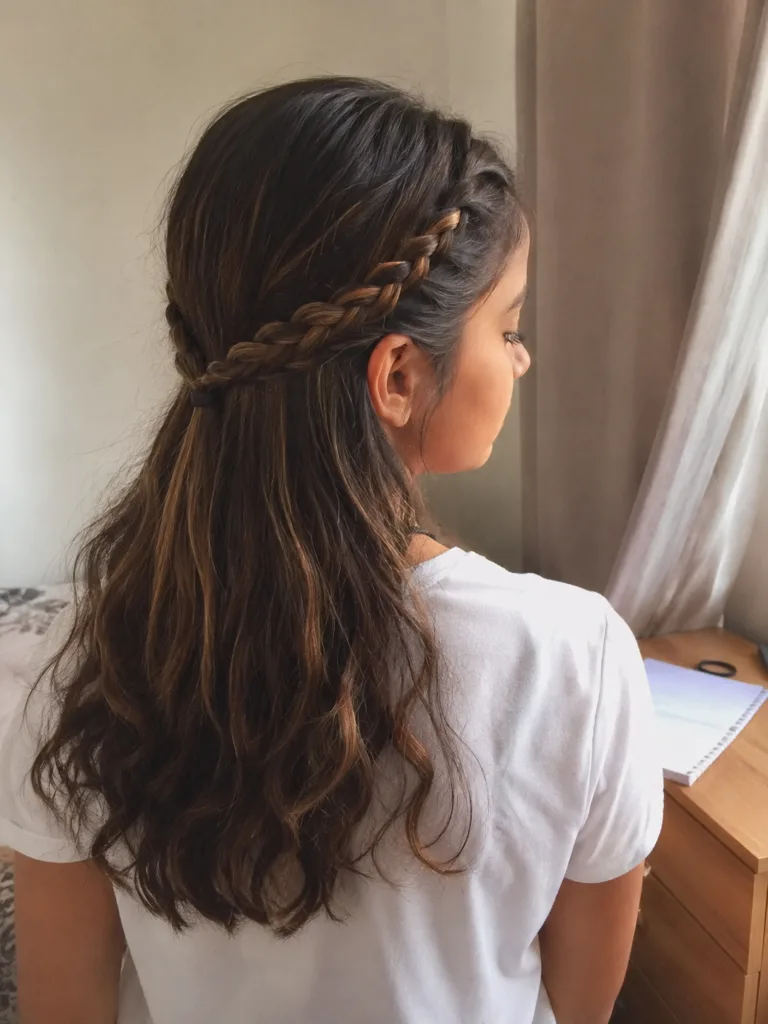
Replace the twists with two narrow braids and bring them across the back like a horizontal band. The remaining hair can stay straight, wavy, curly, or coily.
Compared with a full braided crown, this keeps much more hair loose and requires less length from each side section. It also sits lower, which can make a circlet or lightweight headpiece easier to position.
The style has enough medieval character for a themed outfit while still behaving like a conventional half-up hairstyle.
Loose Hair With Small Temple Braids
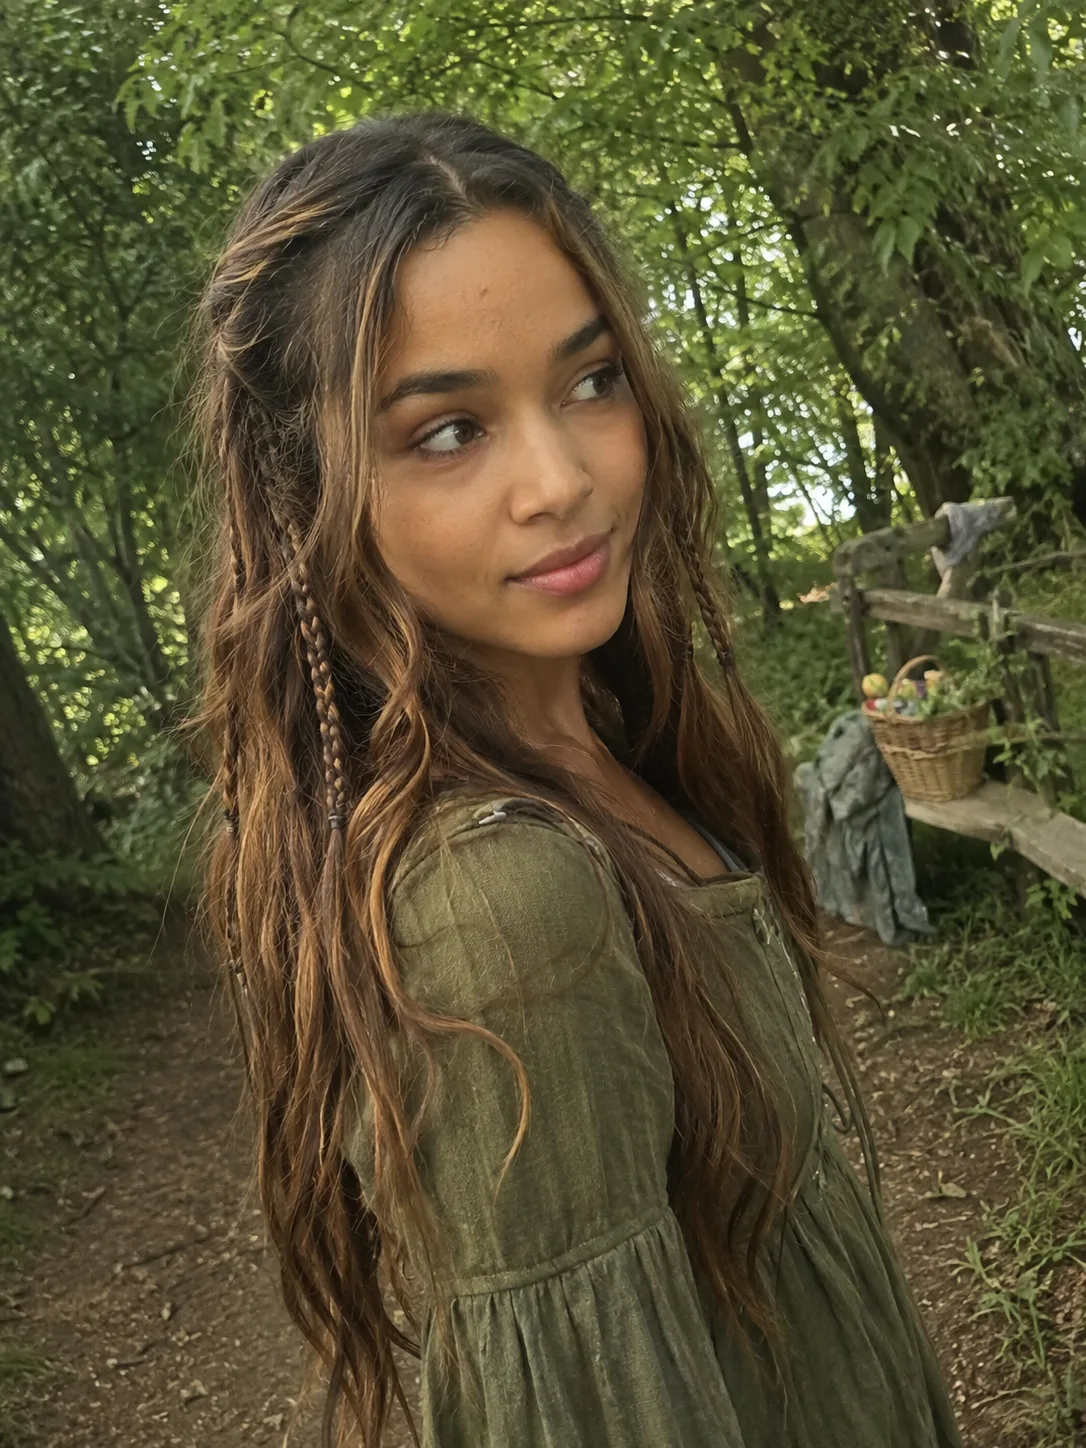
Small braids beginning near the temples give otherwise loose hair a medieval-fantasy edge without requiring an updo. Their job is framing rather than holding the entire hairstyle together.
Keep the number of braids restrained. Multiple tiny braids scattered through the lengths create a different, more festival-oriented aesthetic.
This option works particularly well when natural curls or waves are a major part of the look. Allowing that texture to remain visible gives the hairstyle movement while the temple braids add structure near the face.
More Dramatic Court and Fantasy Interpretations
Large Braided Side Loops
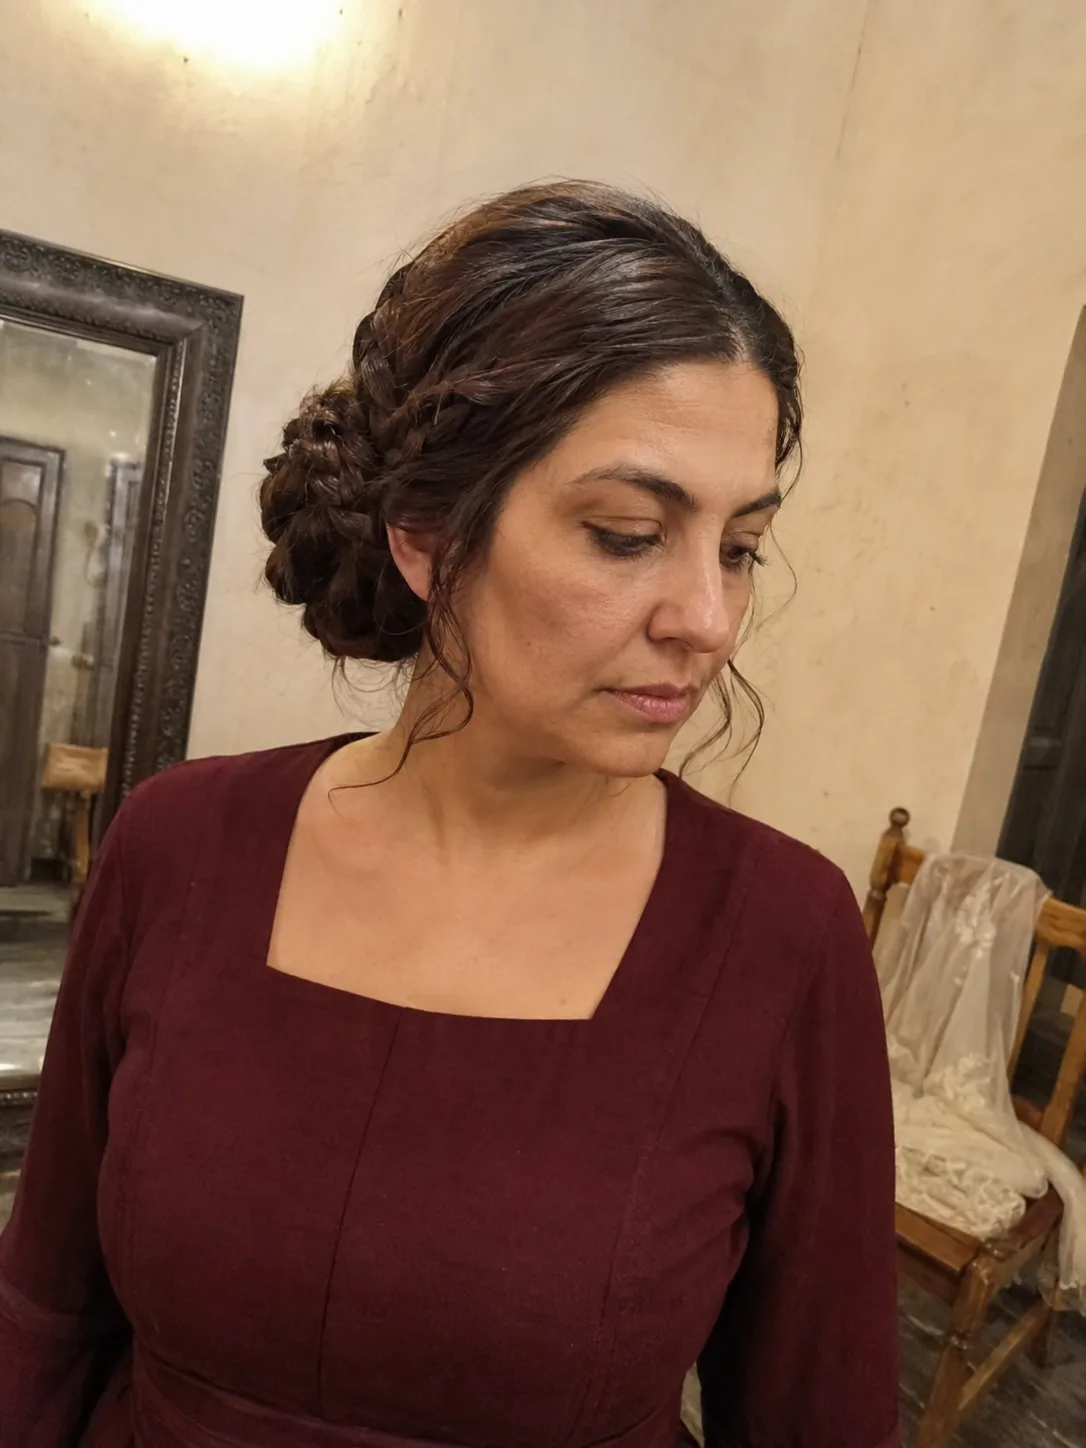
Braids can be curved upward and backward into large loops on either side of the head, producing a much wider silhouette than low coils. This is a costume-forward style and needs enough hair, padding, or discreet added hair to make the loops look balanced.
Build the shape before adding decorative fabric or a headdress. Trying to force identical loop sizes can create unnecessary tension when one side naturally has slightly different density or length.
This style is worth the extra work for portraits or dramatic court-inspired clothing. It’s far less convenient for long periods against a high-backed chair.
Heart-Shaped Side Rolls
Late-medieval-inspired head shapes are sometimes recreated with two structured rolls or padded sections that create width above the temples and narrow toward the crown. Hair may cover, wrap around, or help anchor the underlying form.
This is less a casual hairstyle than a complete head-dressing construction. The relationship between hair and headdress creates the effect.
A costume with strong architectural lines can support the exaggerated width. With a simple dress, the same hairstyle may dominate everything else, so decide whether the hair is meant to be the centerpiece before building it.
Braided Court Updo With Veil
For maximum detail without relying on one enormous feature, combine a controlled center part, side braids, a compact braided back section, and a veil attached above or around the construction.
The strength of this style is layering. You see different elements from different angles instead of one large bun or crown.
Keep the hierarchy clear. The braids should establish the shape, while the veil and accessories finish it. Loading every visible section with beads, flowers, ribbon, and metal decoration can obscure the braid work and make the hairstyle feel more fantasy-costume than courtly.
What Medieval Hairstyle Photos Often Hide
A finished photograph tells you very little about how the hairstyle feels after several hours. Wide side coils can interfere with fitted headwear. A thick crown braid can change where a circlet sits. Large back constructions become noticeable against chair backs, while long loose braids may catch beneath cloaks, straps, or costume fastenings.
Headwear should be part of the planning from the beginning. Put on the actual veil, circlet, net, hood, or other covering during the styling test. Check the hairstyle from the side and rear, then sit down and move your head normally.
Hair texture can also change the scale of the finished shape. Fine strands describe strand diameter, while low density means there are fewer strands overall. Either characteristic can affect the fullness of a braid, but they aren’t the same thing. Added hair can create more size where appropriate, though the attachment should remain secure and comfortable rather than relying on excessive tightness.
Curly and coily hair doesn’t need to be straightened simply because a historical reference shows a smooth surface. A stretched state can make certain wrapped structures easier to reproduce, while a natural state creates fuller braids and coils. Choose the state that works with your intended result and normal hair-care practices.
Choosing Between Historical and Fantasy Medieval Hair
For a historically focused costume, begin with the headwear and the broad period you’re representing. A compact braid beneath a veil can communicate the idea more convincingly than an elaborate modern updo covered in themed accessories.
Fantasy styling gives you much more freedom. Loose waves, exposed crown braids, decorative metal pieces, flowers, ribbon, and deliberately oversized shapes can all work because exact historical construction isn’t the priority.
A middle ground often works best for weddings and formal events. Use a medieval construction—such as a center part, crown braid, low coils, or veil-compatible nape style—then finish the surface with the level of softness expected from modern event hair.
The outfit should also influence the scale. A heavily decorated gown can benefit from controlled hair. Simpler clothing leaves more room for large braids or dramatic side structures.
Keeping Braids, Coils, and Headpieces Comfortable
Medieval-inspired styling can involve substantial pinning, especially when long hair is wrapped into compact shapes. Spread the support across the hairstyle instead of forcing one section to carry everything.
Pins should anchor stable sections without scraping the scalp. Braids and wrapped pieces should feel secure during ordinary movement without producing persistent pulling or pain. Added hair, padding, nets, and heavy accessories all change how the style sits.
The hairline deserves particular care in braided crowns and side constructions. Shorter or fragile perimeter hairs don’t need to be dragged into a braid simply to create a perfectly smooth edge.
After the event, remove pins and decorative pieces methodically before unraveling tightly wrapped sections. Elaborate styling creates multiple crossing points where hair can catch, so fast takedown can cause more tangling than the hairstyle itself.
Persistent pain, sores, redness, or a concerning change in shedding or density deserves more than another styling adjustment. Remove the source of pulling and consider speaking with a dermatologist or another qualified healthcare professional if symptoms persist or concern you.
A Practical Consultation Checklist
Before deciding on a medieval hairstyle, settle the construction before the decoration.
Decide whether you want historical inspiration, modern romance, or full fantasy.
Choose the hairstyle with the actual veil, circlet, net, or head covering in mind.
Consider how much length must be braided, wrapped, or concealed.
Decide whether your hair will be worn natural, stretched, curled, or otherwise styled.
Check the hairstyle from the front, side, and back.
Sit against a chair and test normal head movement.
Make sure pins and braided sections feel secure without persistent pulling.
Keep decorative pieces secondary when the braid pattern is meant to remain visible.
Plan the takedown before adding complicated layers of hair and accessories.
For most first attempts, a low braided bun, crossed nape braids, or a half-up braided band is more practical than an elaborate side structure. You still get a clear medieval reference without building the entire hairstyle around padding, added hair, or a complex headdress.
Related Hairstyles to Explore
- Easy prom hairstyles to do yourself
- Hairstyles for school
- Back to school hairstyles
- Hairstyles for wedding guest
FAQs
Can you create medieval hairstyles with short hair?
Yes, although shorter hair changes which constructions are realistic. A half-up twist, small temple braids, compact roll, circlet style, or covered hairstyle can work without long lengths. Discreet added hair can also create a braid or coil when the attachment method suits your hair and remains comfortable.
Do medieval hairstyles work on curly or coily hair?
They can work very well. Natural texture creates fullness in braids, twists, and coils and doesn’t need to be straightened automatically for the theme. Some tighter wrapped structures may be easier on stretched hair, so choose the styling state according to the construction you want and how you normally care for your hair.
What is the easiest medieval hairstyle for beginners?
A single low braid is the simplest, while a half-up braided band gives more visible detail without demanding complicated pinning. For an updo, a braided nape coil is a useful starting point because the braid keeps the length organized before it is pinned into shape.
How can I make a medieval hairstyle look less like a modern festival braid?
Simplify it. Use a clear center part or restrained crown shape, limit scattered accessories, and choose one dominant construction such as paired braids, a low coil, or a veil. Highly loosened braids, excessive face-framing curls, and numerous decorative accents tend to shift the result toward contemporary fantasy styling.
Hair Texture & Upkeep Style Matcher
Select your natural hair texture and daily maintenance window to get an instant styling formula and heat safety cap.
Heat Cap: 320°F (160°C)
A versatile three-strand braid beginning at the parietal ridge, securing the top half while allowing natural wave texture to flow freely around the shoulders.
Conclusion
The strongest medieval hairstyle starts with the role the hair needs to play. A historically influenced costume often benefits from compact braids, covered hair, and deliberate headwear placement. A wedding or fantasy event gives you more freedom to expose the hair, enlarge the braid work, and use softer texture.
Before adding decoration, solve the basic shape. Decide where the hair will sit, what has to fit over it, and whether you can comfortably wear that construction through the event. A simple braid that works with the clothing and headpiece will usually look more convincing than an elaborate style fighting everything around it.
Editorial Standards & Hair Health Guidance
Every style featured on Tress Atlas is curated with a focus on real-world wearability, scalp tension management, and cuticle preservation. When trying protective styles or tight updos, ensure perimeter hairline sections remain tension-free to avoid traction stress on delicate follicles. For heat styling, cap tools below 350°F (180°C) to prevent thermal keratin denaturation.
Scientific Sourcing: Practices aligned with the American Academy of Dermatology (AAD) on traction alopecia risk reduction and cosmetic trichology research on hair tensile strength.