Star Hairstyle: What Changes the Result
A star hairstyle uses parting, braid direction, or both to create a recognizable star shape on the scalp. The star might sit at the crown as the main feature, appear on one side as an accent, or connect into cornrows, hanging braids, puffs, ponytails, or a bun.
The design looks playful, graphic, and highly detailed in photographs. Real-life success depends on something less obvious: whether the rest of the hairstyle gives the star enough space to remain visible.
A complicated braid pattern can actually hide a star. Very small sections can make the points difficult to read. Added hair can create a dramatic finish while also increasing weight. Curly or coily hair can give the surrounding style beautiful volume, but shrinkage and root expansion affect how crisp the parting appears as the hair is worn.
For most people, the strongest starting point is a clearly defined star paired with a comparatively simple surrounding style. Let the geometry do the work instead of crowding it with every decorative technique at once.
What Counts as a Star Hairstyle?
The defining feature is the star itself, not one particular braid technique.
A stylist can create the shape primarily through parting, separating a star-shaped section from the surrounding hair. That center section might become a braid, ponytail, puff, twist, or another small feature.
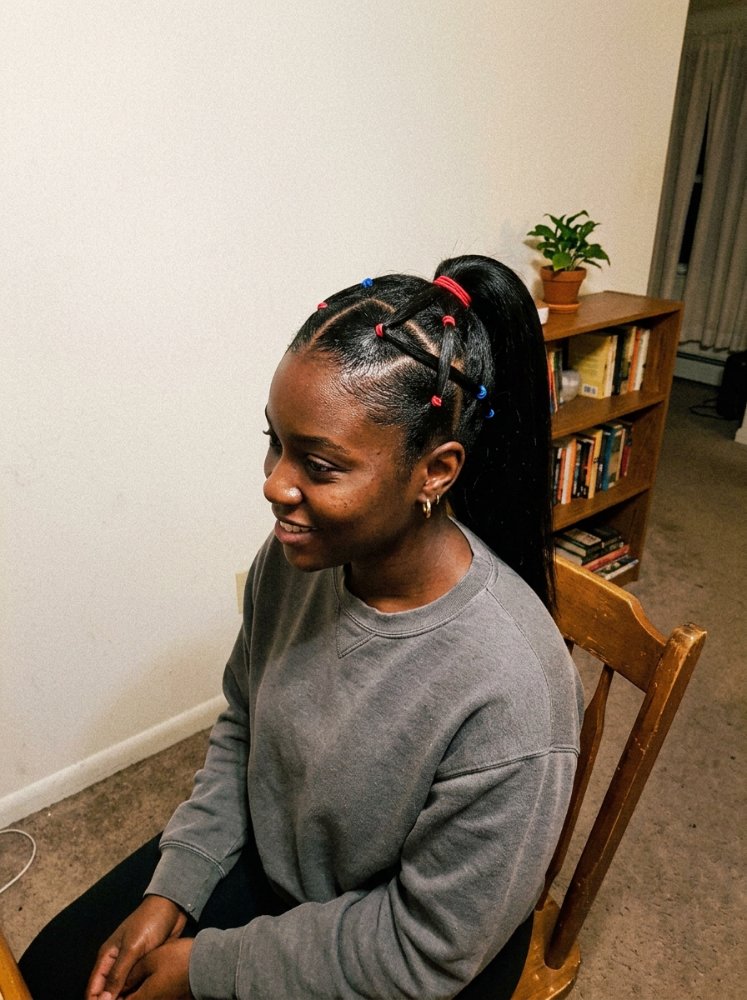
Another approach uses cornrows or other scalp braids to outline the star or travel outward from its points. Here, braid direction becomes part of the drawing. Curved or straight braid lines surrounding the star can make it look larger and more graphic.
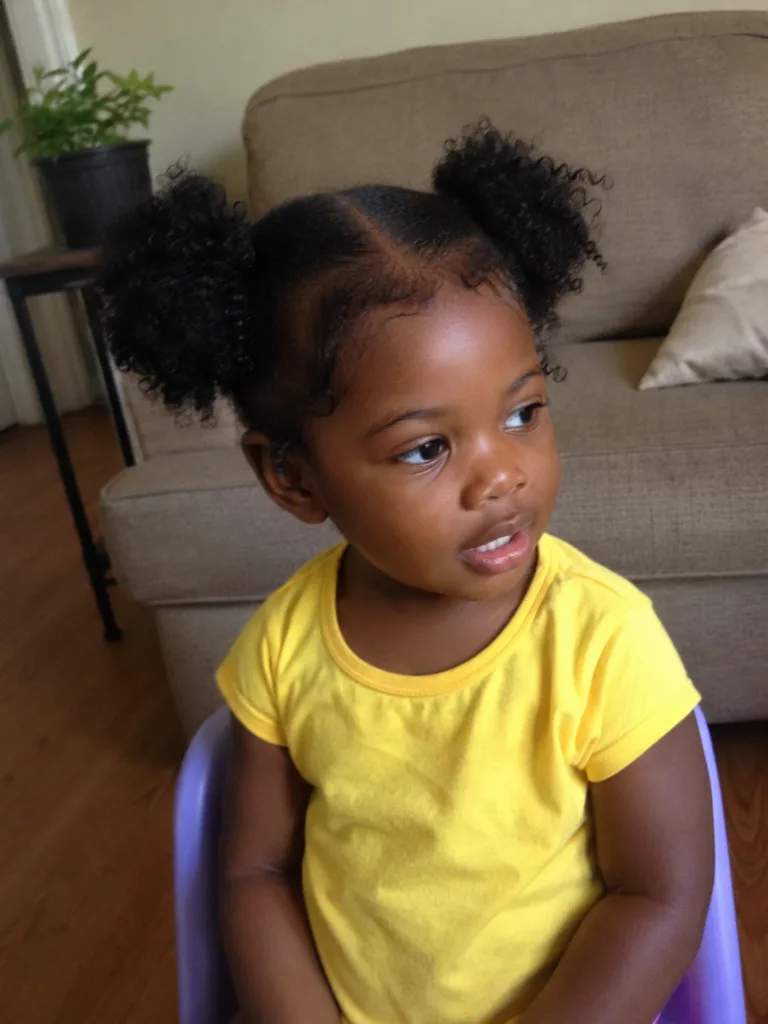
There are also hybrid versions. A star at the crown might feed visually into hanging braids. A small side star can interrupt an otherwise simple cornrow pattern. Two puffs or ponytails can sit around a central star part. Loose curls may surround a crisp geometric section.
These versions behave differently after the photo is taken.
A star created mostly through visible part lines depends heavily on clean sectioning and scalp contrast. A braided star has more physical structure, so the design may remain recognizable as some root fuzz develops. A star combined with long added hair introduces another concern: movement at the lengths can transfer force back toward relatively small sections at the scalp.
That construction decision should come before accessories, braid length, or finishing details.
| Star hairstyle type | Visible effect | Main planning issue |
|---|---|---|
| Star-shaped part | Clean geometric scalp detail | Part definition and surrounding volume |
| Star cornrows | Bold braided pattern | Braid direction and comfortable tension |
| Star with puffs or ponytails | Playful shape with visible volume | Keeping the star exposed |
| Star with hanging braids | Detailed scalp design plus length | Added-hair weight and movement |
| Star accent | Smaller decorative detail | Placement and visual contrast |
Placement Changes More Than the Photograph Suggests
The crown is an obvious place for a star because the head provides a relatively broad area for the points to spread. It also gives the design a strong top view. That works especially well with puffs, braids directed downward, or styles that leave the crown uncovered.
There is one practical catch: you don’t constantly see the crown when looking straight into a mirror.
A crown star can be spectacular from above while reading as a fairly ordinary braided style from the front. Decide whether that matters. Someone choosing the design primarily for photographs, an event, or artistic detail may love that placement. Someone who wants the star to be immediately visible face-to-face might prefer a star positioned closer to the front or side.
Side placement creates a different effect. The design becomes easier to notice from a normal viewing angle and can sit beside curls, twists, braids, or a closely shaped section of hair. It also gives you less uninterrupted scalp area than the crown, so the star usually needs enough negative space around its points to stay legible.
Hairline placement deserves more restraint. Tiny geometric sections near delicate perimeter hairs can demand more control than the visual payoff warrants. The star does not need to capture every short hair around the edges. Leaving fragile or very short perimeter hairs out can produce a more comfortable result without weakening the overall design.
Glasses matter too. A bulky braid pattern around the temples can compete with the arms of the frames. A star positioned higher or farther back leaves that area easier to manage.
Parting Quality Matters More Than Extra Decoration
Star hairstyles are unusually dependent on the spaces between sections.
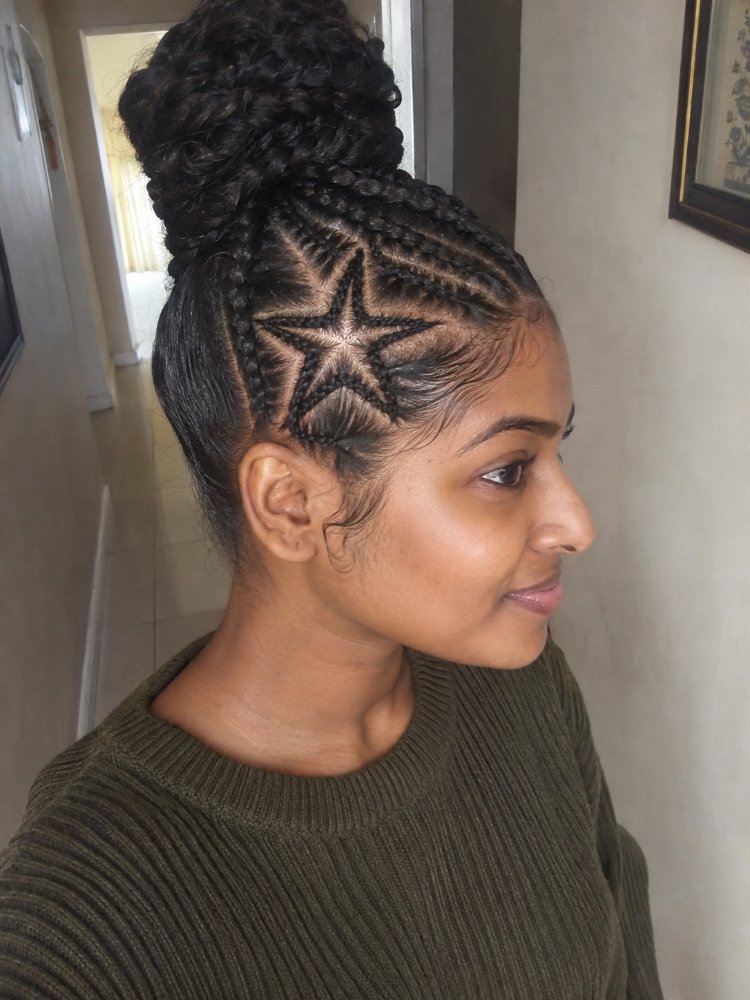
With a standard straight-back braid, a slightly imperfect part may disappear into the overall direction of the style. A star exposes every change of angle. Uneven points, crowded corners, or hair crossing into neighboring sections can make the shape difficult to recognize even when the braiding itself is neat.
This is why a simpler star often reads better than an extremely intricate one.
Each point needs room. The surrounding hair should create enough contrast for your eye to trace the outline without searching for it. Adding several tiny braids around every edge can reduce that contrast and turn one strong shape into a field of competing lines.
The center matters as well. Several braids converging around a small area can create more concentrated pulling than widely spaced, straightforward rows. A technically sharp star should still allow normal facial movement and scalp comfort.
For a salon appointment, bring a reference that shows the top or side of the head where the pattern is visible, not only a finished front-facing portrait. The stylist needs to see where the points begin, where each braid travels, and what happens to the surrounding sections.
Better yet, discuss the finished construction rather than asking for an exact visual copy. Your available scalp area, hairline, density, normal styling state, and chosen braid size all change how closely a pattern can be reproduced.
Natural, Curly, Coily, Stretched, and Straightened Hair Give Different Results
A star can work across many textures, but the starting hair state changes both the process and the appearance.
On naturally curly or coily hair, shrinkage affects how the loose portions sit around a star part. Two puffs may become compact and rounded when fully shrunken, while stretched hair produces a longer, more expanded shape. Neither is inherently better. They frame the geometric center differently.
Texture also affects how long perfectly exposed part lines remain the main visual feature. Root movement, humidity, manipulation, and new growth gradually soften a highly precise scalp design. A style can still look attractive after that happens; it simply changes from sharply graphic to softer around the roots.
There is no requirement to straighten curly hair simply to create a star. Detangling and manageable sectioning are more important than forcing every texture into the same preparation state. Some styling methods use stretched hair because it makes sectioning easier, while other designs can be created successfully with the hair closer to its normal texture.
Density requires separate thinking from strand thickness.
Fine hair means the individual strands have a smaller diameter. Low-density hair means there are fewer strands overall. A large, highly exposed star may reveal more scalp than desired on low-density hair, particularly when the surrounding sections are pulled tightly away from the design.
A smaller accent or a version surrounded by fuller texture can sometimes create a more balanced appearance.
At the other end, very dense hair can make the sections physically substantial. That gives a stylist plenty of hair to work with, but dense roots also need good cleansing and drying access when the style is braided close to the scalp.
A Star Part, Star Cornrows, or Added Braids?
These three choices can look related online while requiring very different commitments.
A star part with loose hair, puffs, or simple ponytails is the easiest version to choose when the geometry is the main attraction. There is less visual competition, and you avoid turning the entire head into an elaborate installation. This is the strongest practical option for someone who loves the star but isn’t committed to long braids.
Star cornrows put more emphasis on scalp art. The surrounding braids can outline the shape, radiate from it, or travel around its points. This version is more technique-dependent because braid direction and section planning must work together. Moving one row affects the available space for the next.
A star pattern leading into hanging braids creates the biggest transformation. You gain length, movement, and a more substantial finished hairstyle. You also add weight, more hair to reposition during sleep and dressing, and potentially more complicated removal.
Added hair deserves a proportionate approach. Dramatic length isn’t necessary for the star to work. In fact, moderate length can keep attention on the scalp pattern while making everyday movement simpler.
The attachment should feel comfortable from the beginning. Extension hair cannot compensate for a base that pulls excessively, and a lighter-looking installation can still be uncomfortable when small sections carry too much force.
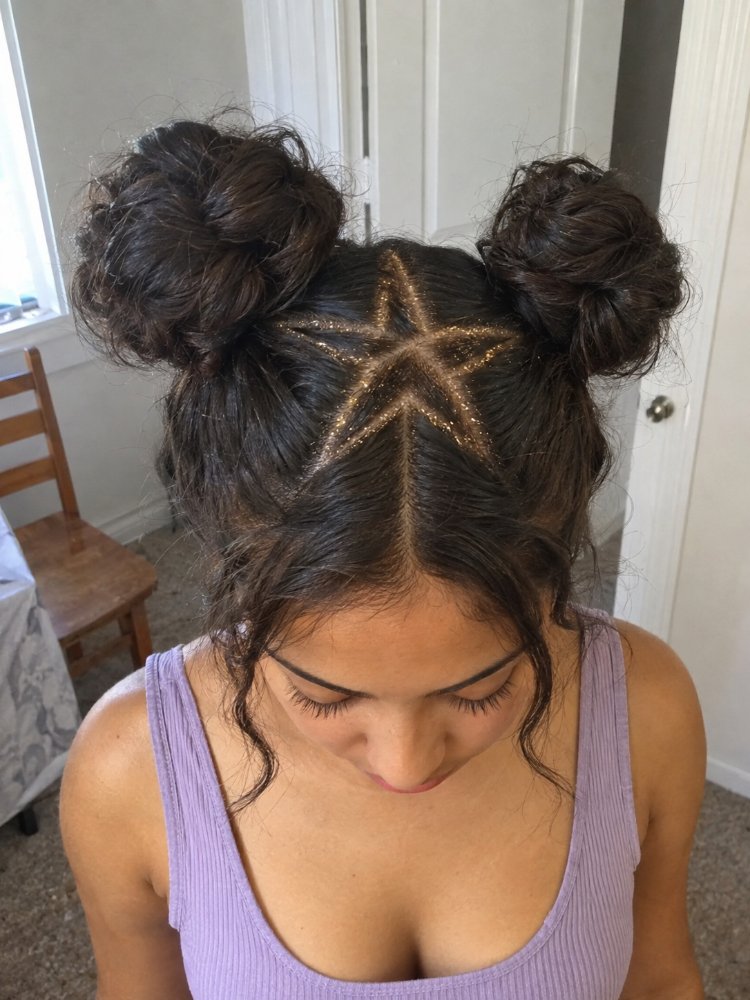
How to Create a Simple Star-Part Hairstyle
A clean star part is a more realistic starting project than attempting an advanced multi-directional cornrow design without the necessary braiding skill. You can pair the finished star with puffs, ponytails, twists, or simple braids.
Begin with detangled hair in a state that allows clean sectioning. Gather a rat-tail comb or another precise parting tool, clips for holding unused sections, and the elastics or styling aids appropriate for your chosen finish.
1. Decide where the star will sit.
Choose the placement while thinking about how the finished hairstyle will be viewed. A crown design needs enough open space around it. A side star should be positioned where surrounding hair won’t immediately cover the points.
2. Establish the center area.
Separate the hair you expect the star to occupy from the rest of the head. Clip surrounding hair away. This makes it easier to concentrate on the geometry without loose strands drifting back into the section.
3. Map the points before securing anything.
Use the tail of the comb to outline the star gradually. Don’t rush to secure the first clean-looking point. Check how all of the points relate to one another because adjusting the overall shape becomes harder after sections are braided or tied.
4. Refine the corners.
A star reads through its angles. Hair crossing the part lines will soften those angles immediately, so move stray strands into the correct section before progressing.
5. Secure the star section according to the finished style.
The center can become a small ponytail, braid, twist, or another contained element. Avoid pulling harder simply to make the part look sharper. Neat sectioning creates definition more effectively than excessive tension.
6. Style the surrounding hair.
Create the puffs, ponytails, braids, or loose texture that will frame the star. Keep checking the design from the angle where you want it to be seen. Surrounding sections shouldn’t collapse over the star unless partial concealment is part of the intended look.
7. Test normal movement.
Turn your head, raise your eyebrows, move the surrounding hair, and check the scalp. Any area that feels persistently painful or sharply tight needs attention before the style is treated as finished.
Advanced star cornrows add another level of difficulty because each braid must follow a planned direction while preserving the visible geometry. That version is more salon-dependent when clean scalp art is the main priority.
What Photos Hide About Daily Wear
A fresh star hairstyle is often photographed immediately after the parts have been completed. That’s the moment of maximum contrast.
Daily life changes the surface.
Root fuzz softens the sharp borders. Loose curls expand. A puff can shift enough to cover part of a crown star. Scarves, bonnets, hats, and headrests press against different areas depending on where the design sits.
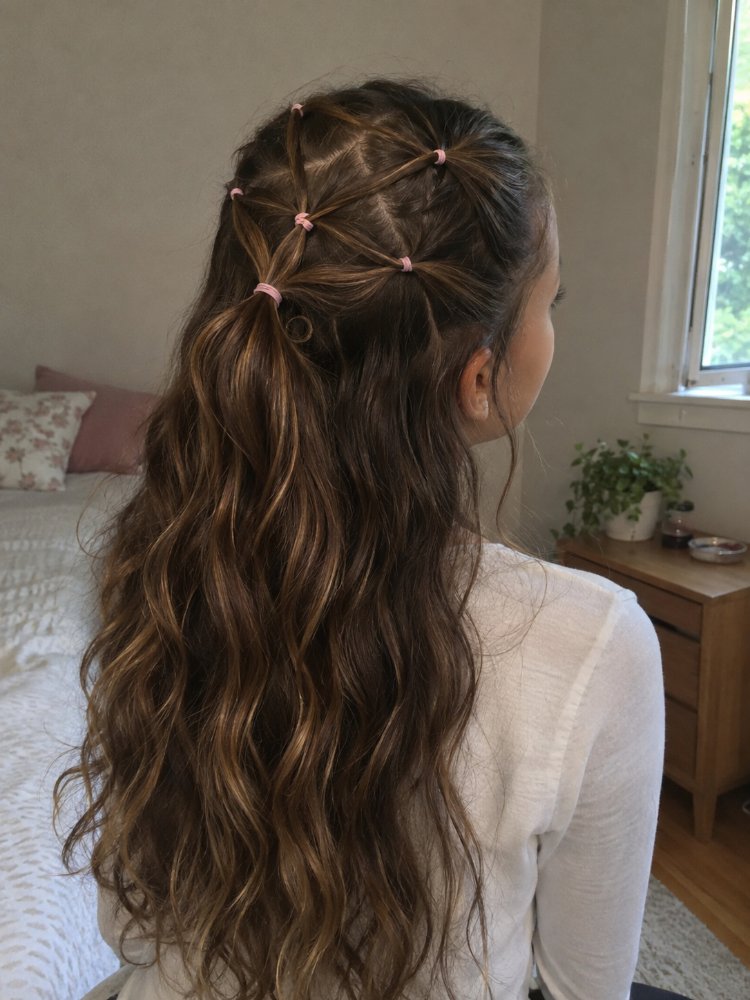
None of this means the hairstyle has stopped working. It means you should decide whether you like the star only at peak crispness or whether you’re comfortable with a softer version as the hair moves and grows.
Large accessories deserve some editing. Beads, cuffs, colorful elastics, curls, and decorative clips can all work with star hair, but using them everywhere can compete with the feature you paid the most attention to creating. One dominant visual idea is usually stronger.
Sleeping is easier when any long braid lengths can be gathered without forcing the scalp pattern in a different direction. A smooth scarf or bonnet can reduce friction and help contain loose hair. It can’t correct an uncomfortable installation.
Cleansing should preserve scalp access rather than treating the part lines as something that must remain untouched at all costs. Build maintenance around your scalp comfort, activity level, buildup, and styling state. Dry the roots thoroughly before covering or styling damp sections closely against the scalp.
Tension and Comfort Deserve Their Own Check
Geometric styling creates a temptation to tighten every section until the angles look extremely crisp.
That is a poor trade.
A star depends on accurate parting and thoughtful braid direction. Pain adds nothing to the design. Small points and convergence areas deserve particular attention because several sections can interact within limited scalp space.
Children’s star hairstyles should prioritize the same principle even more strongly. The pattern can be fun without very tight edges, heavy extensions, or discomfort being treated as necessary for neatness.
The term protective style also needs context. Braids may reduce some daily manipulation, while the overall effect still depends on root tension, added weight, friction, cleansing and drying access, and gentle removal.
Persistent pain, stinging, sores, redness, ongoing irritation, sudden shedding, or a concerning change in density goes beyond ordinary styling inconvenience. Removing or loosening the source of pulling may be appropriate, and persistent or concerning symptoms warrant discussion with a dermatologist or another qualified healthcare professional.
Maintenance Is Mostly About Preserving the Pattern Without Overworking It
The star will usually show wear first along the part lines and roots because that is where the design is most visually precise.
Constantly applying more styling product isn’t always the most useful response. Product buildup can leave the exposed scalp and roots feeling coated while doing little to restore a part that has naturally softened through movement and growth.
Focus instead on reducing unnecessary disturbance.
Covering the style with a smooth scarf or bonnet can limit friction. Keep long braids from repeatedly catching beneath clothing or straps. Avoid turning a comfortable braided star into a high, tightly anchored bun that redirects all of the lengths toward one point.
Loose star styles need slightly different care. Puffs, curls, and ponytails can be refreshed according to the needs of the loose hair while leaving the central geometry reasonably undisturbed. Trying to preserve every original part indefinitely can create more manipulation than simply accepting a softer outline.
Removal deserves patience, particularly with braided versions. A geometric pattern can send sections in directions that aren’t obvious once frizz and new growth cover the original parts. Follow each braid back to its actual base instead of assuming neighboring sections travel in parallel.
What to Decide Before a Salon Appointment
A star hairstyle becomes easier to plan once you stop treating the reference photo as one indivisible look.
Break it into choices.
First, identify where the star is located. Crown, side, and front-adjacent designs look very different during ordinary conversation.
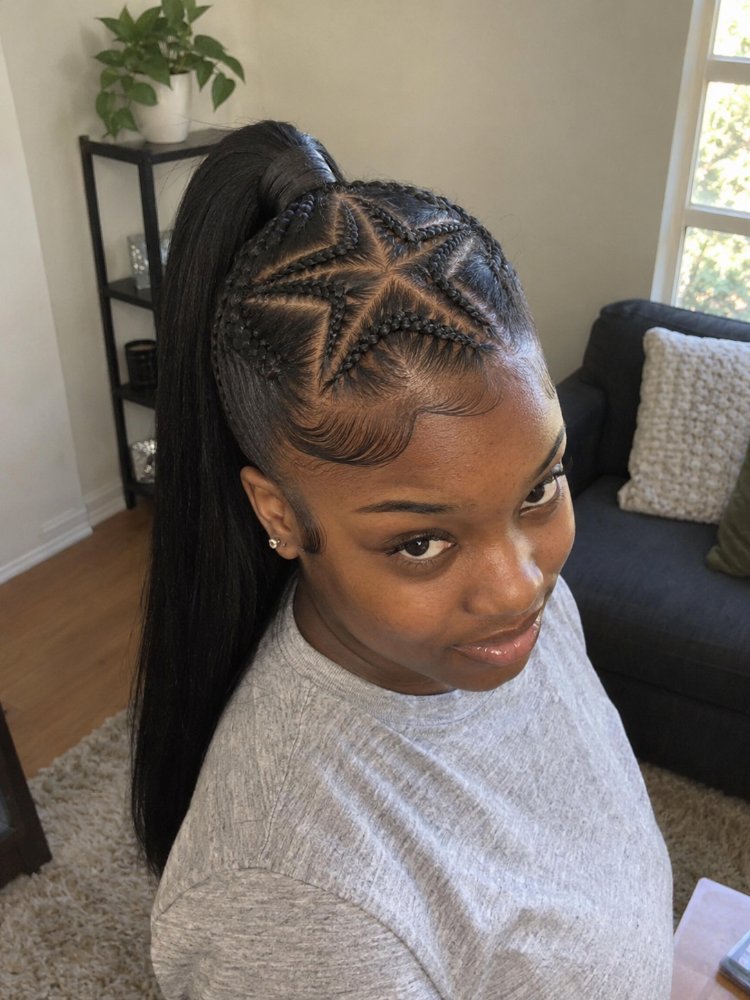
Next, decide whether the star comes from parting, braids, or both. This determines how technique-heavy the appointment becomes.
Then decide what happens outside the star. Loose curls create softness. Puffs make the style playful. Straight-back cornrows keep the scalp pattern dominant. Hanging braids introduce movement and length. A bun concentrates the finish and can obscure part of a crown design depending on placement.
Discuss your normal hair state as well. Someone who normally wears substantial shrinkage needs the surrounding loose portions planned for that reality, not only for freshly stretched preparation. Previous chemical services, fragile areas, and significant breakage also matter when choosing how much tension and manipulation to place into small geometric sections.
Finally, prioritize the feature you actually care about. A crisp visible star, extremely long braids, high volume, elaborate accessories, and multiple detailed braid techniques can all compete for attention. Pick the star as the hero and build the rest of the hairstyle around it.
FAQs
Can a star hairstyle work on short hair?
It can, provided there is enough length in the relevant sections to create the chosen construction securely. A simple star part with small puffs or contained sections may demand less hanging length than a star that flows into long scalp braids. Very short areas can also be left out of the pattern rather than being forced into tight sections.
Can you wear a star hairstyle on natural curly or coily hair?
Yes. Curly and coily hair can be used in shrunken, partially stretched, or more fully stretched styling states depending on the design and technique. A star paired with natural puffs or curls creates a particularly strong contrast between geometric parting and fuller texture. Plan around your real shrinkage rather than expecting the loose hair to remain exactly where it sat during styling.
Do star braids need extensions?
No. Natural hair can be used for many star-part and cornrow designs when the available length supports the intended technique. Extensions become useful when additional braid length or fullness is part of the desired finish. Keep added-hair weight appropriate to the size and condition of the sections carrying it.
Is a star hairstyle suitable for kids?
A simple star part with comfortable braids, puffs, or ponytails can make a fun children’s hairstyle. Keep the construction low tension, use manageable sections, and prioritize easy cleansing and removal. Very heavy added hair or painful edge styling isn’t necessary to make the star recognizable.
Can you wash your scalp with star braids?
Scalp access should remain part of the maintenance plan. Cleanse according to your scalp, activity, buildup, and styling needs, taking care not to scrub the braid pattern aggressively. Pay attention to drying at the roots because closely braided areas can remain damp after the exposed lengths feel dry.
What should I do if the star part starts looking fuzzy?
Some softening is expected as roots move and the hair is worn. Gentle smoothing may improve the surface, but repeatedly manipulating every part can create more frizz and stress than it solves. Once the geometry has softened substantially, a less severe-looking star is often preferable to continuously pulling at the roots to recreate first-day sharpness.
Conclusion
The most successful star hairstyle starts with one decision: how clearly you want the star itself to dominate the finished look.
A defined star part with simpler surrounding hair is the most practical entry point. Cornrow and extension versions make sense when the braid work is part of the attraction and the extra installation and maintenance fit your routine.
Before committing, choose the star’s placement, decide what technique will create it, and look carefully at where the surrounding hair will fall once you move away from the reference-photo angle. Sharp geometry comes from good planning and sectioning. It doesn’t require sacrificing scalp comfort to keep every point perfectly crisp.